|
Part 4: Shaping the Seat  There are many different ways to shape the seat of this Shaker bench design. If you have a lot of time, no deadline and good elbows, you could do it all with hand tools. For me this option is just too laborious, so instead I use power tools to remove the bulk of the wood, and then I use hand tools to clean-up and finalize the shape. The way I proceed is pretty much the way Christian Becksvoort demonstrated it in his article. Here it goes: First I generate the cove situated just in front of the row of spindles. To do this, I use my table saw and two straight edges as shown in the picture below.  Set-up at the table saw. With the help of parallel rules, I adjust the height of the blade and set-up the angle of the straight edges that will guide the seat blank. Once everything is secure I lower the saw blade so it just sticks out about 3/16" and slowly push the seat blank though between the guides. I then raise the blade another 3/16" and feed the seat again. I repeat this operation until I reach my mark and have the desired cove. 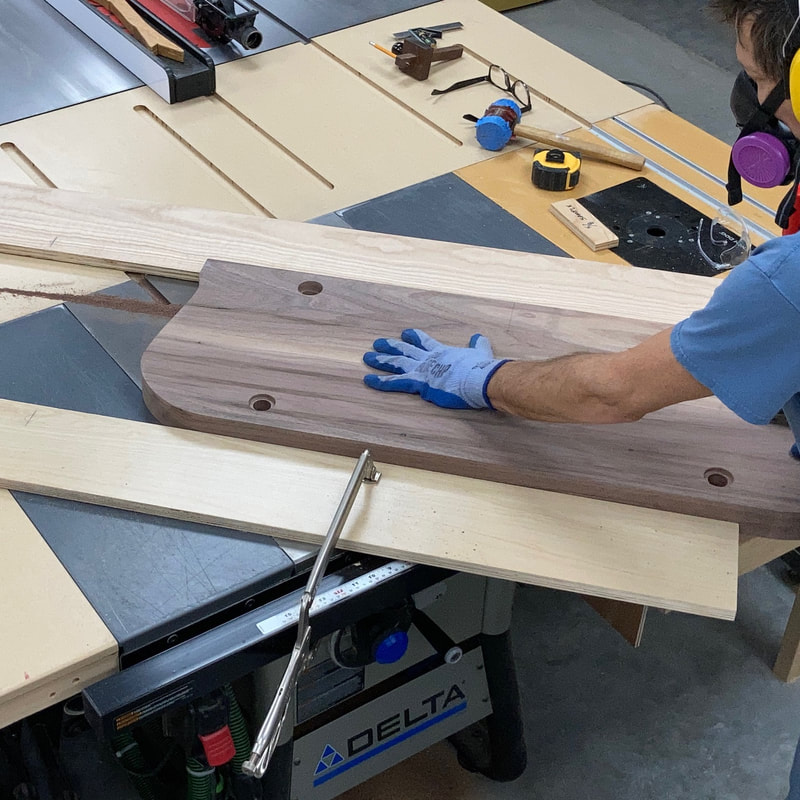 The two boards are clamped to the table saw and guide the seat at the desired angle to create a cove. 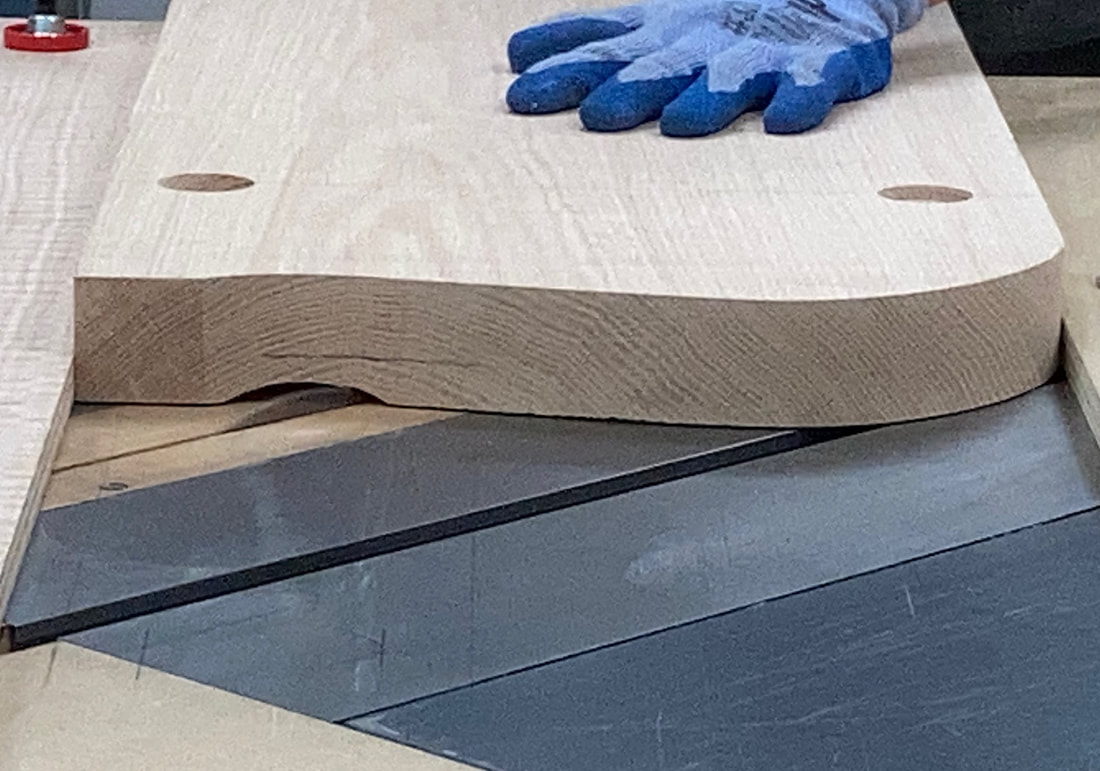 I raise the blade by small increments after every pass until I reach my mark. 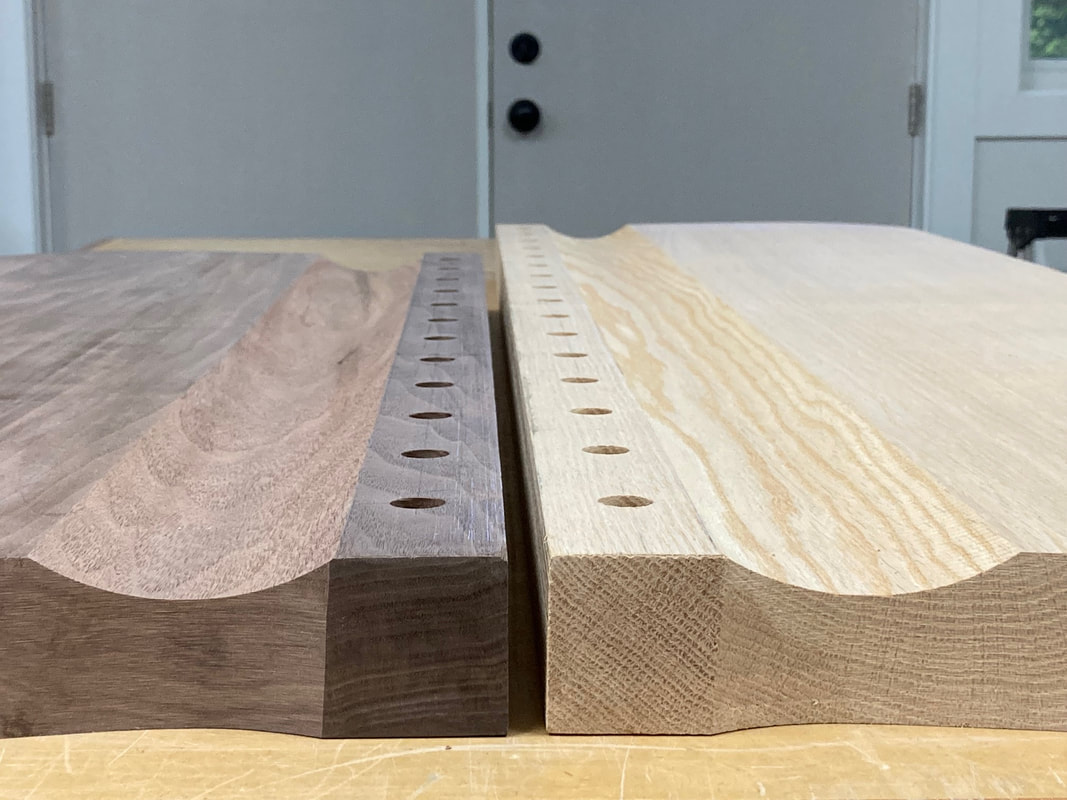 The completed coves. The next step is to cut the slope of the seat which goes from the front edge of the seat to the bottom of the cove that I just made on the table saw. To remove this material, I use a router on a sled that is built to cradle the seat blank and tilted to create the desired slope. It's a messy and noisy job, but I get fairly quickly a nice even slope that will be easy to clean-up with a hand plane later on. 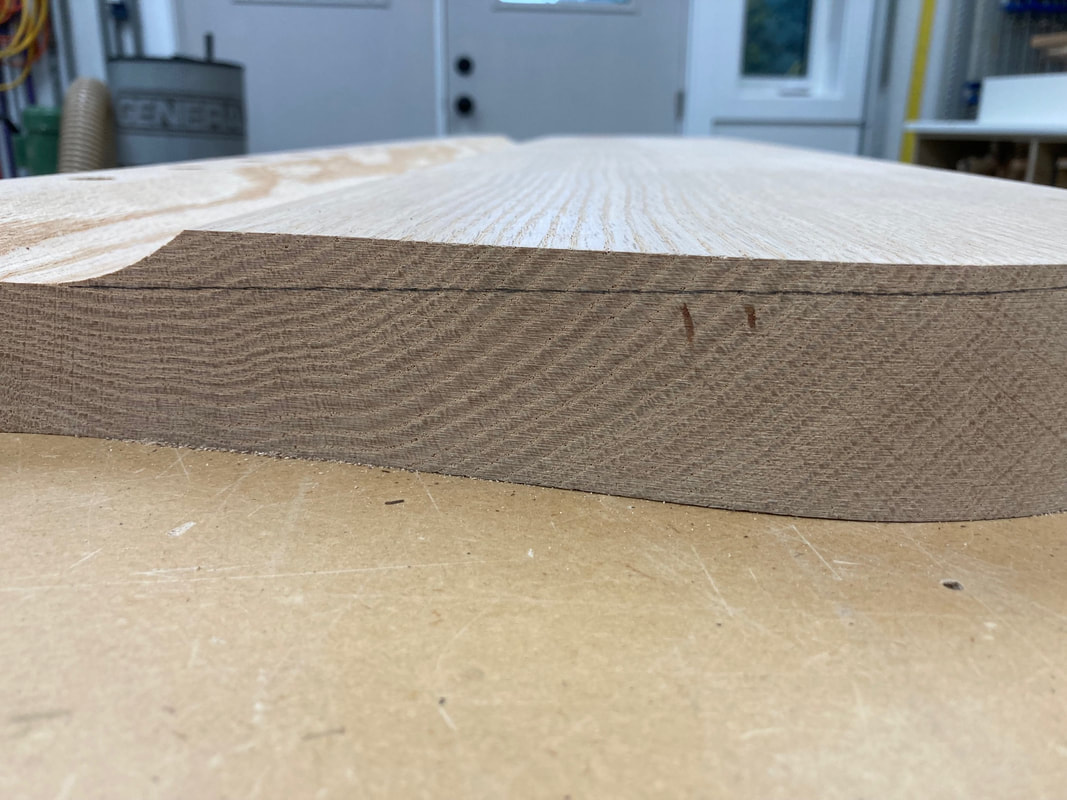 The line shows the slope that needs to routed out. 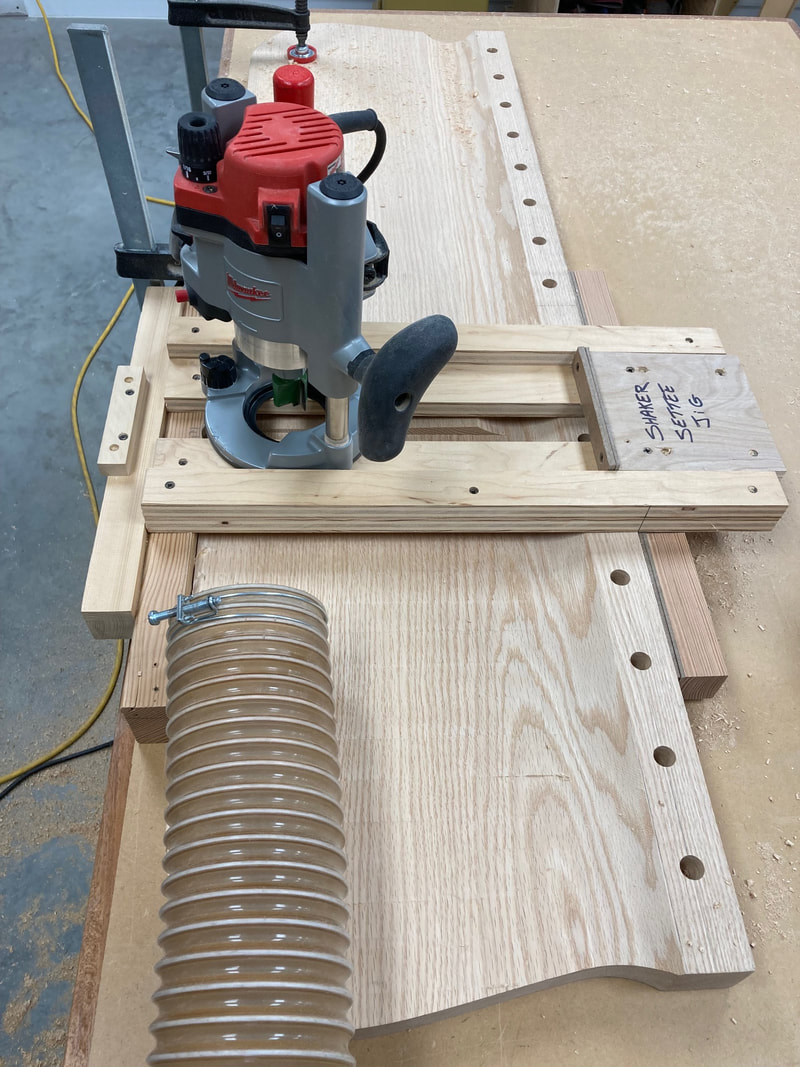 The jig on which the router rides onto. Finally to finish off the bulk of the shaping, I use a router table and a handheld router to round over the top edge of the seat and put a chamfer on the bottom edge. The remainder of the shaping is done with a hand plane, spokeshaves, rasps, scrapers, and sandpaper. 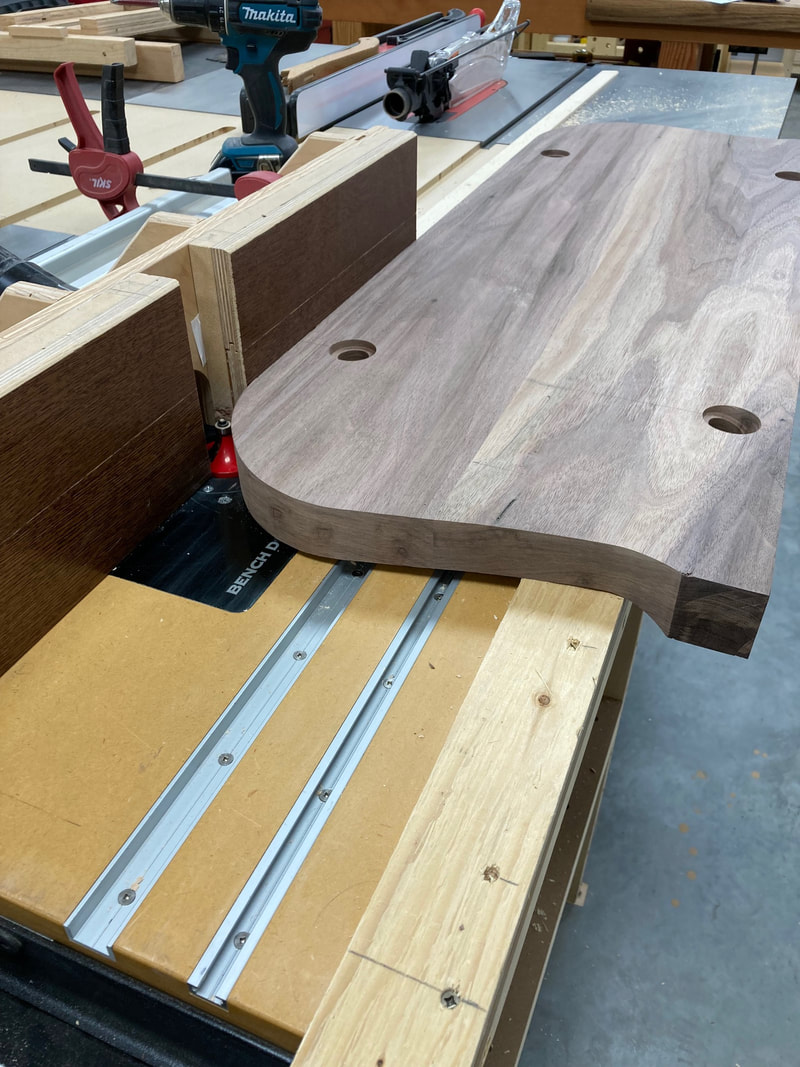 Round over and chamfer at the router table. 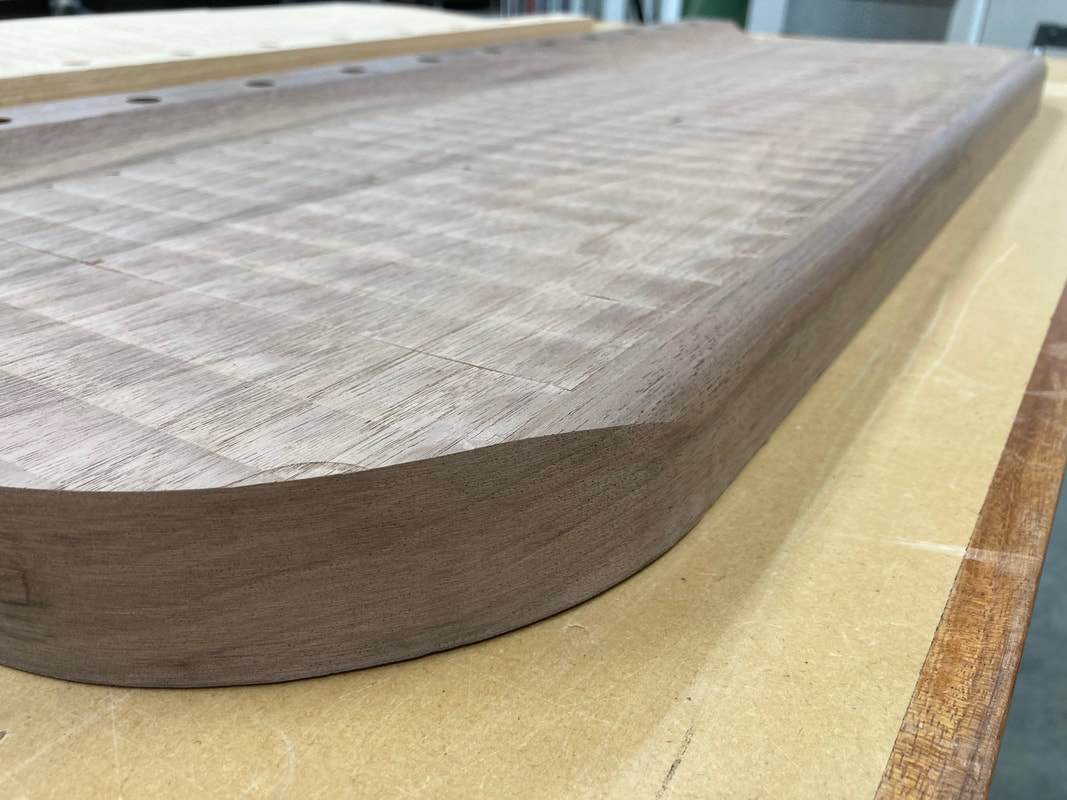 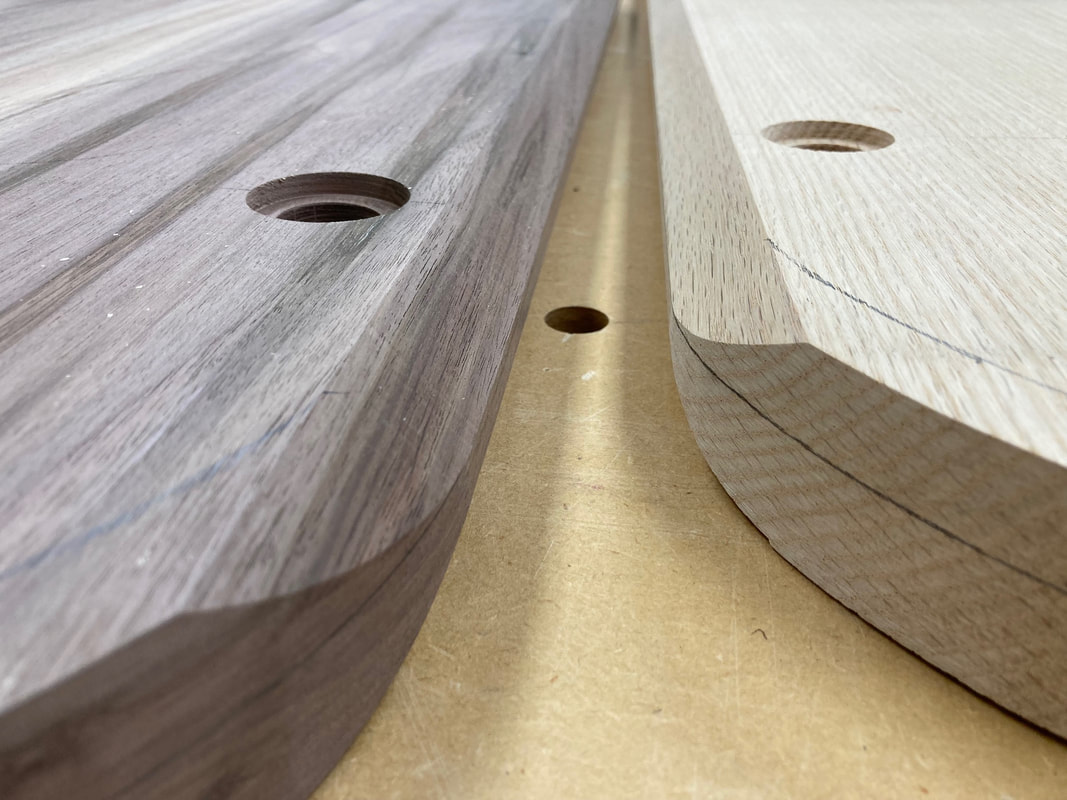 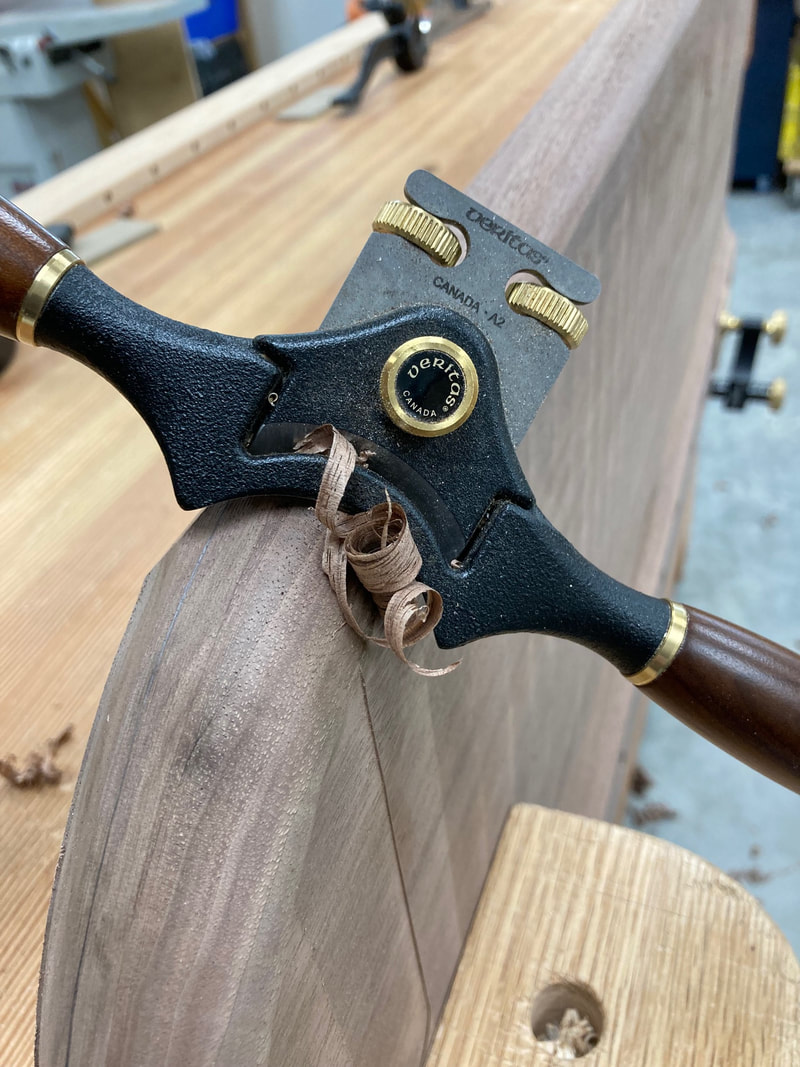 Hand tools to finish the shaping. 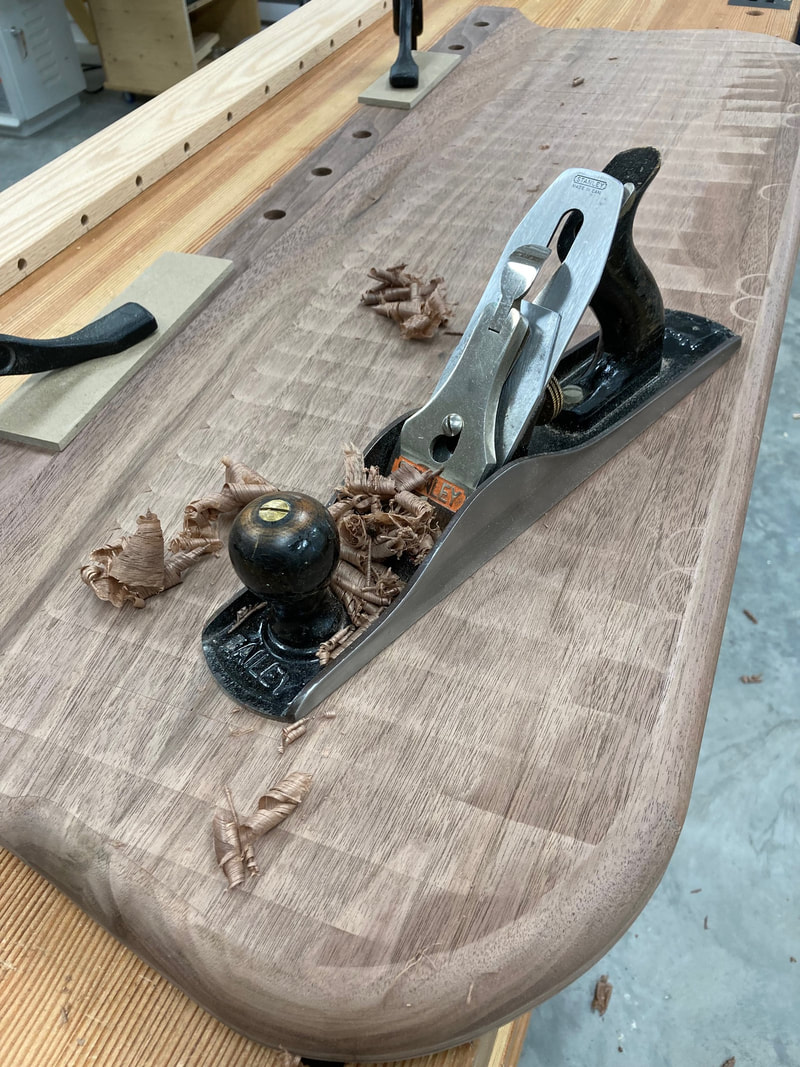 A Jack Plane (no.5) works great to smooth out the seat. 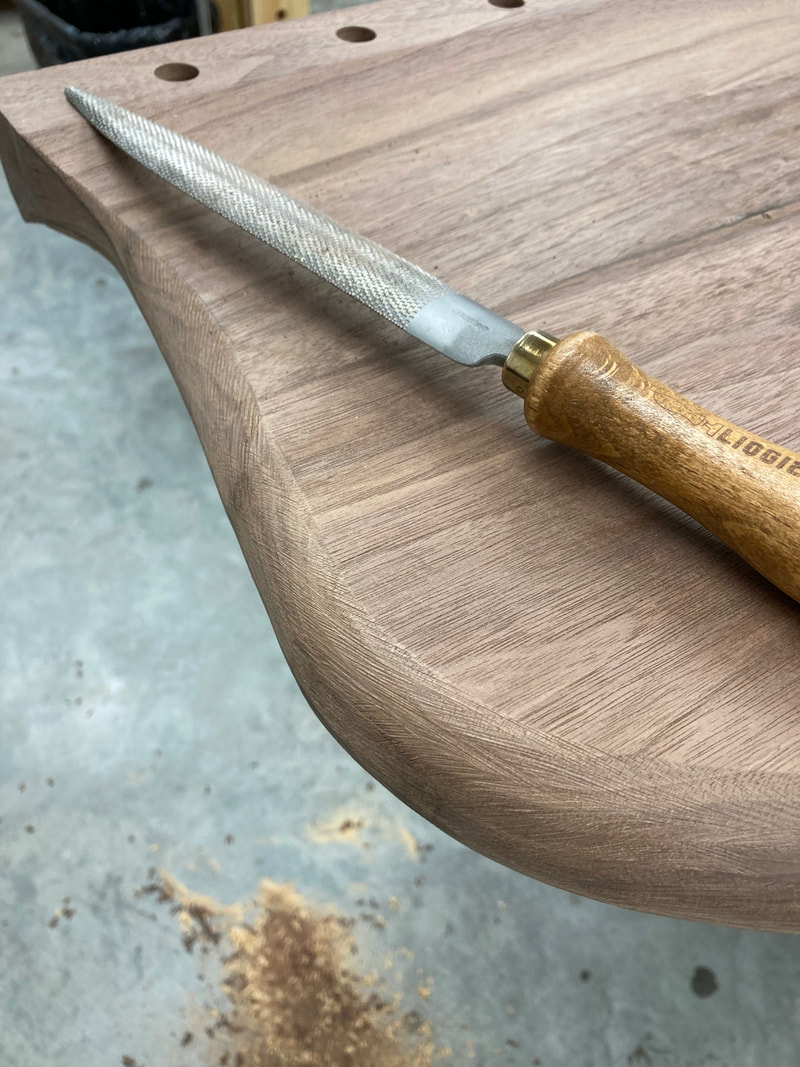 A rasp is the ideal tool to shape the ends of the seat. Part 5: Spindles, Legs, Stretchers and Assembly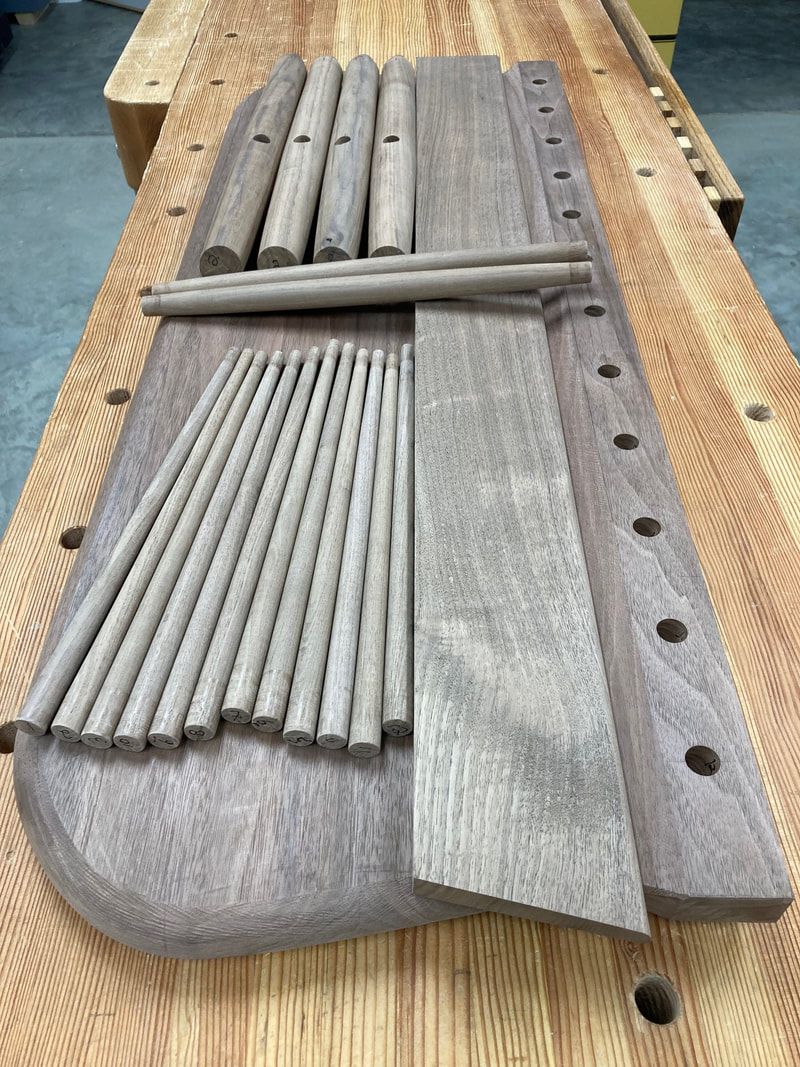 After all of the shaping of the seat is done, it is then time to move on to making the spindles, the legs and the stretchers. I start by making the 5/8" spindles from 3/4" square stock that I run through the Veritas Dowel Maker. From there I move to the lathe, where I turn the spindles into tapered sticks that go from 5/8" at their base to 3/8" at the tips. 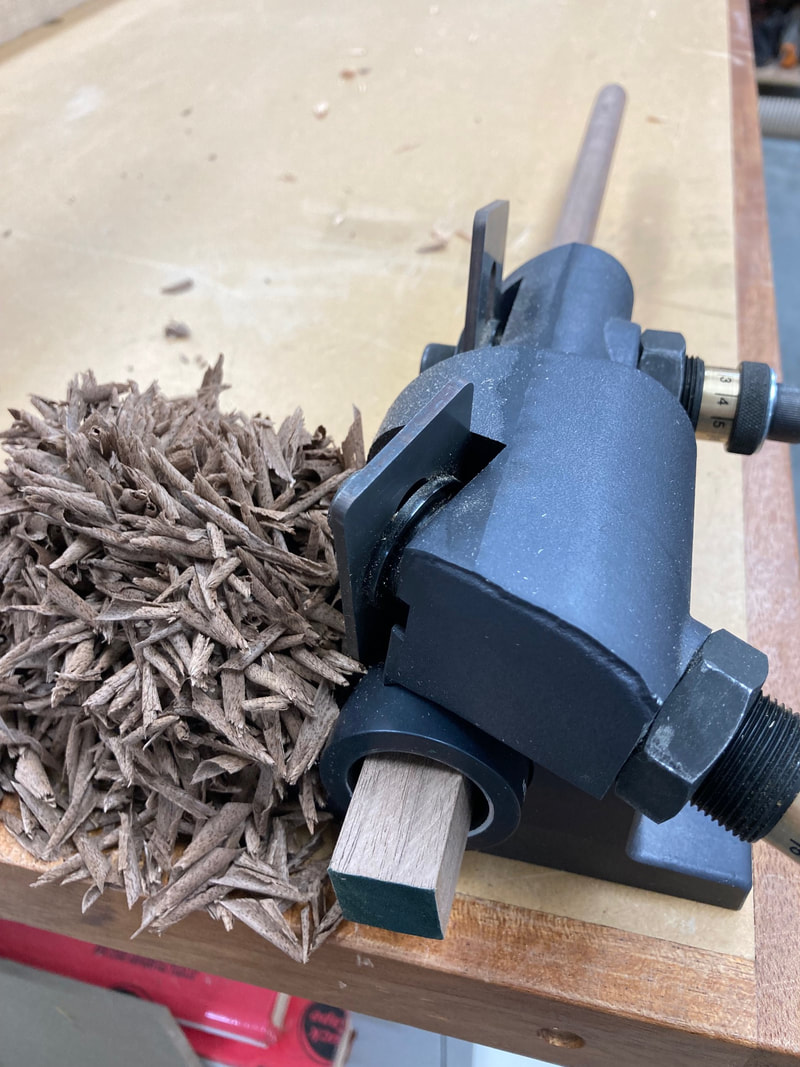 Veritas Dowel Maker 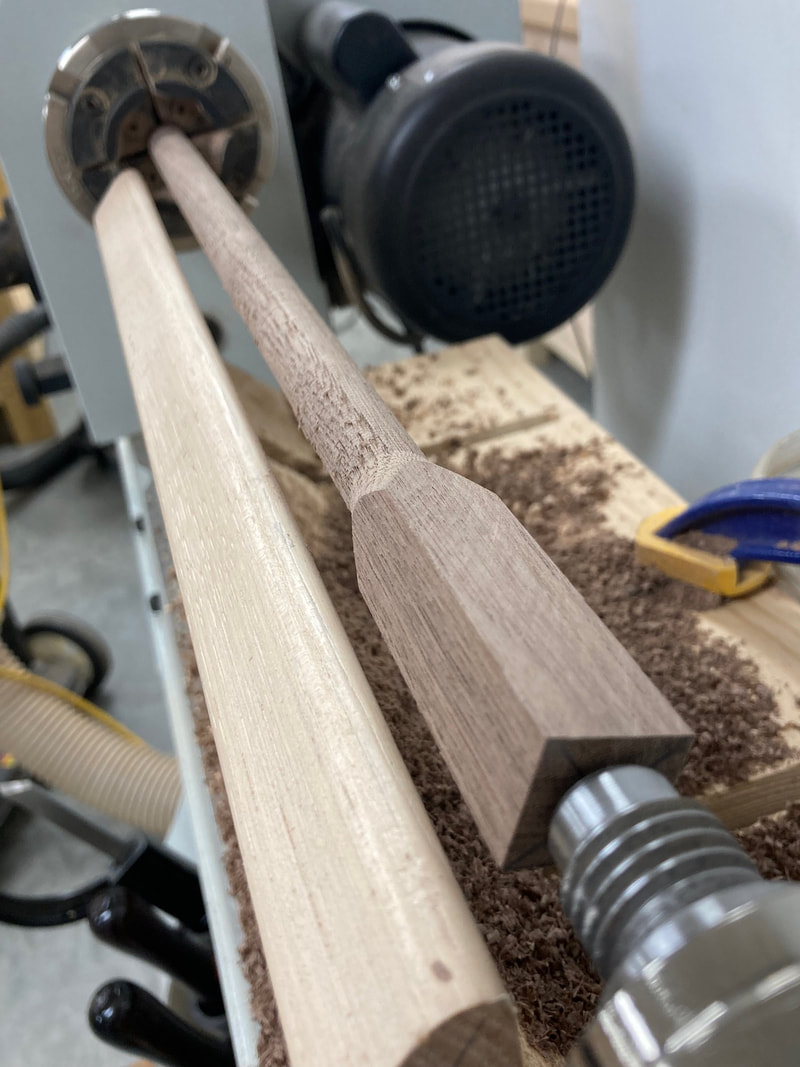 Spindles are tapered at the lathe 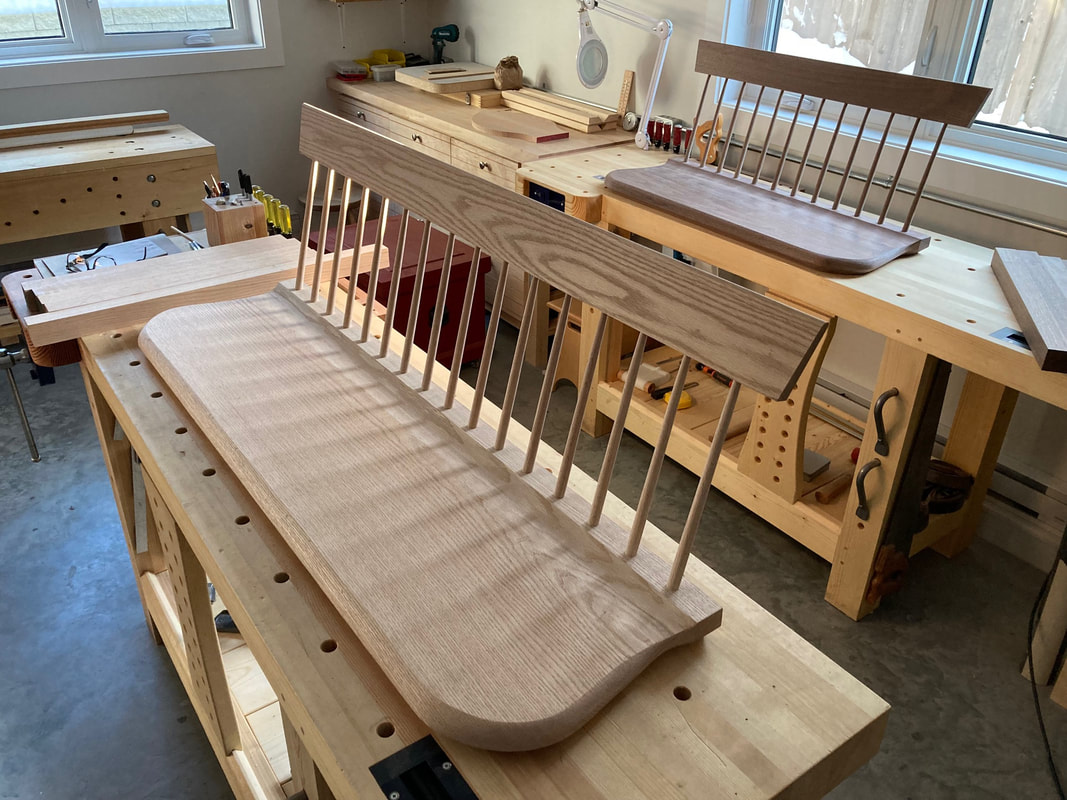 Spindles all done and dry-fitted Once all of the spindles are tapered and the tenons sized, I dry fit the backrest to make sure that everything fits and lines up correctly. I also make a few extra spindles just in case one breaks during this preliminary assembly. Next, I turn the legs on the lathe and I make sure that I size the tenon and the top of the leg that will rest in the stepped mortise very accurately to assure myself that I will have a very strong joint. With all the legs temporary fitted, I mark the location of the stretchers on the legs and use an elastic band to guide me in marking the exact location of the mortises. The elastic band will also help me line-up my drill to cut the mortise at the correct angle (see pictures below). 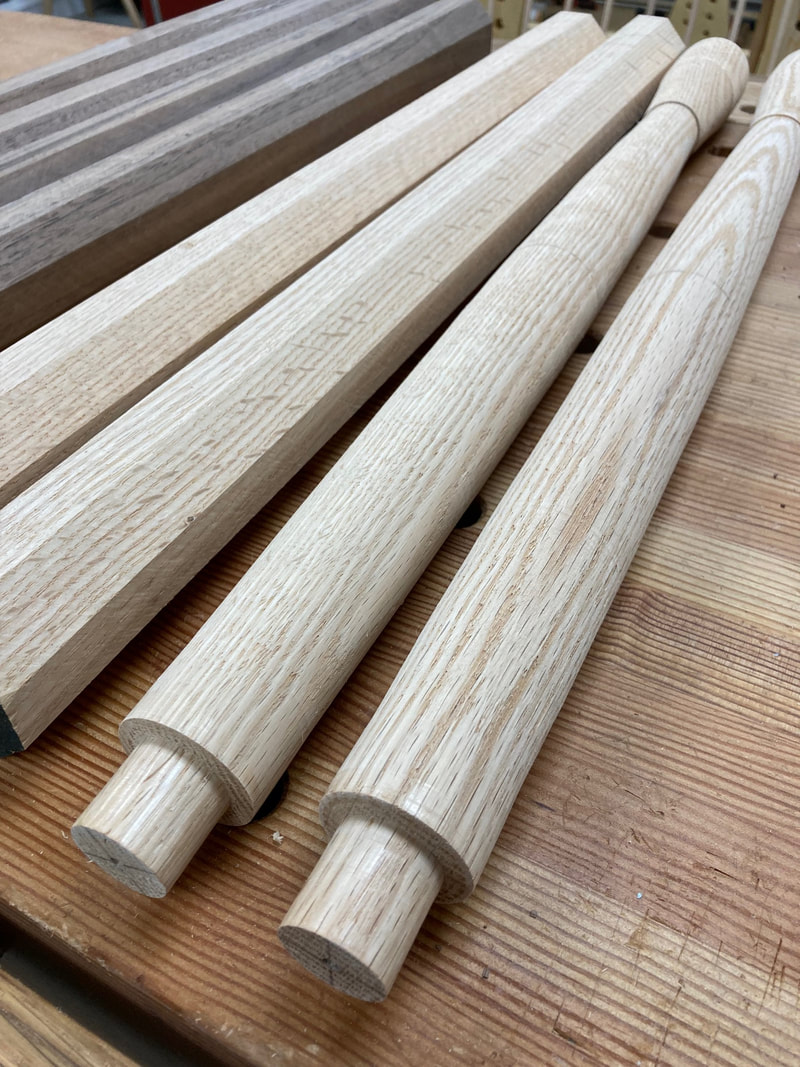 Leg tenons turned with great care to provide a tight and strong joint. 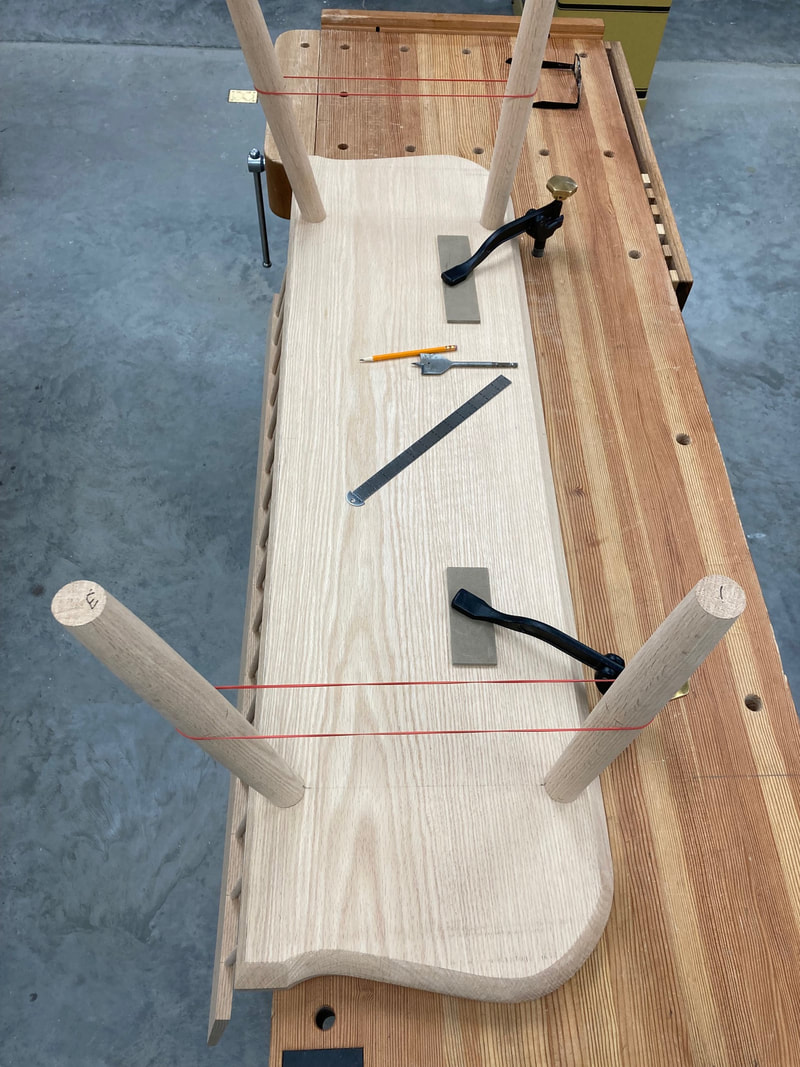 Elastic bands as guides to mark the location of the stretchers. 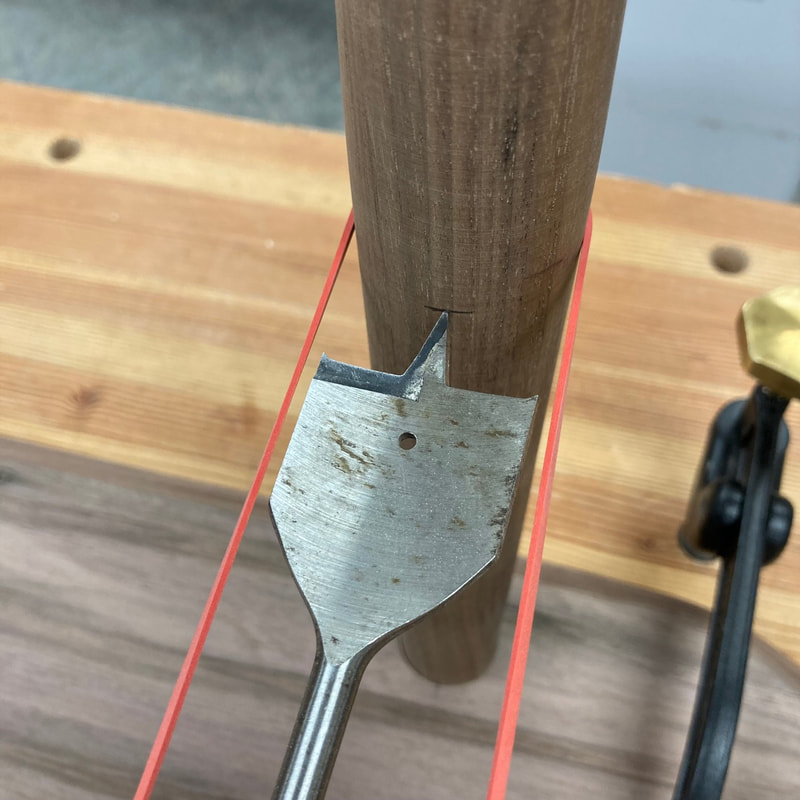 Marking the location of the stretcher's mortice on the centre of the leg using the elastic as a guide. 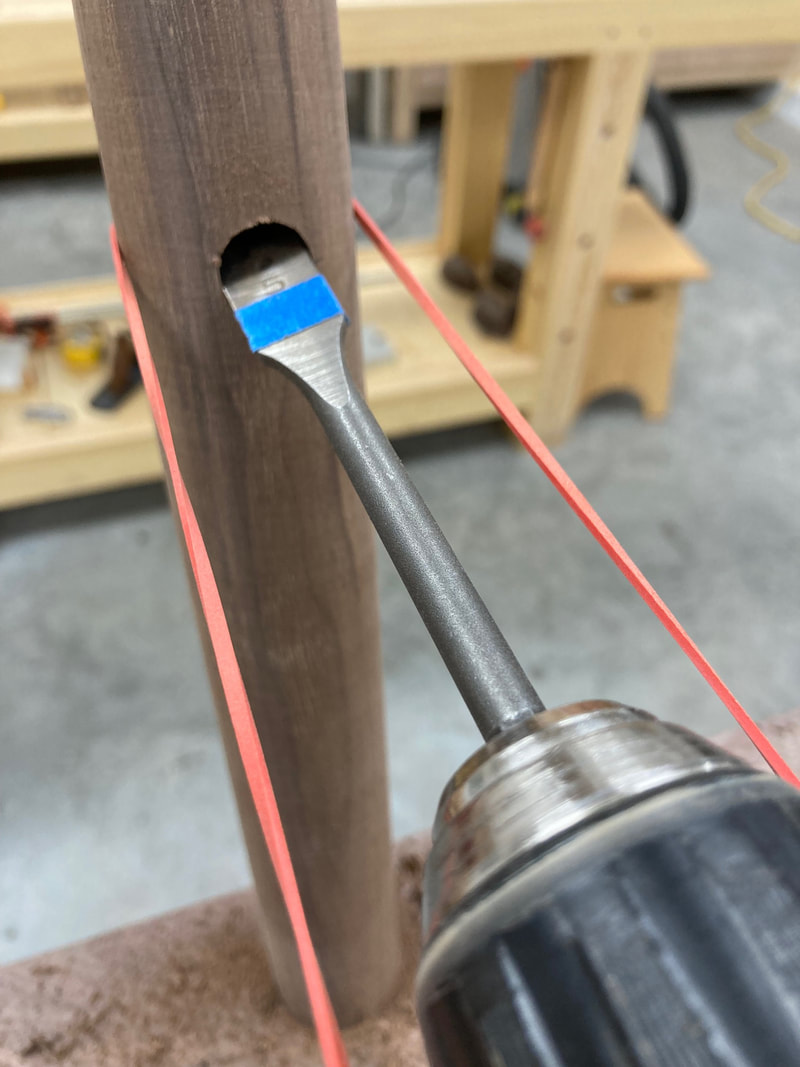 Drilling the stretcher's mortise at the correct angle using the elastic band as a guide. 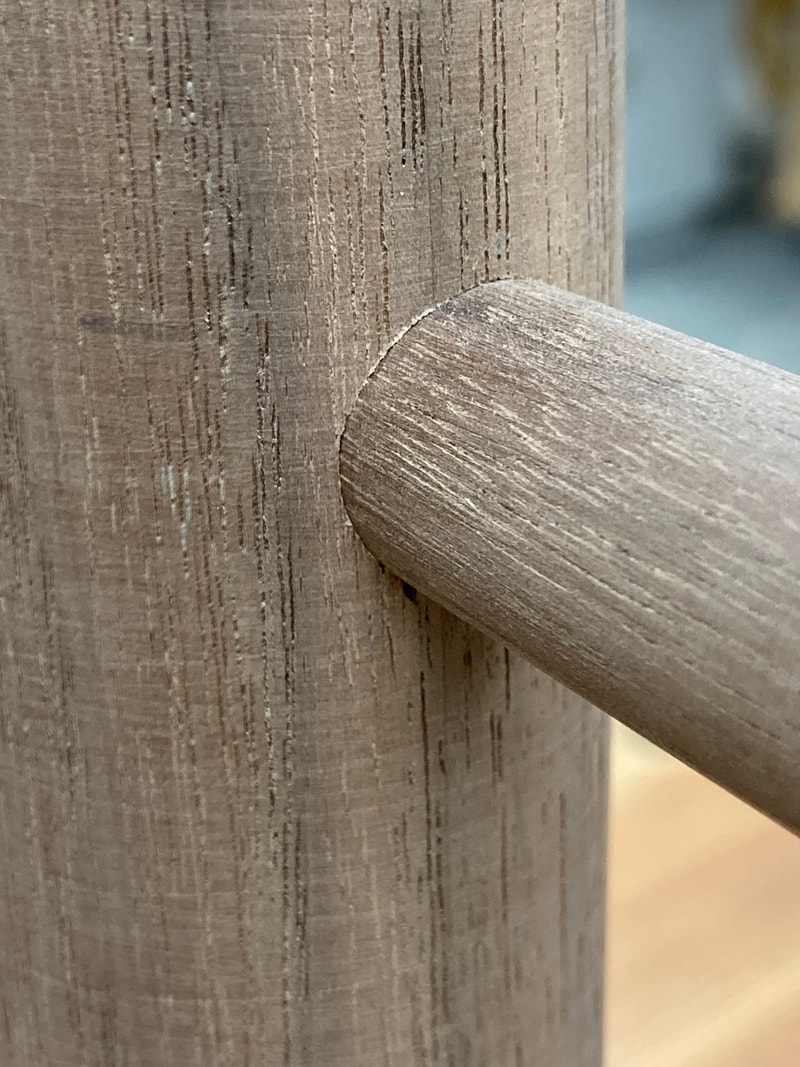 Stretcher to leg joint. Good fit. Finally after dry fitting everything one last time and doing a final sanding of all of the parts, it is time to pull out the glue bottle and proceed to the final assembly. I take the time to organize my assembly area and have everything I need close by and in sight. After a mental rehearsal of the glue-up, I begin. The first step is to glue all of the spindles into the seat. This is the easy part. Most of them go in the mortises easily with hand pressure, but the odd one will resist a bit, so I have a hammer ready to pound those in home. Next comes the tricky part of gluing the backrest to the spindles. On short benches it is not too bad of a deal, but on longer ones, you have to hurry and get all of the tenons coated with glue in a timely manner so you do not end up with the first one you did already dry by the time you are coating the last one. I start at one end, and one by one insert the spindles tenons into the backrest's mortises constantly tapping on the top of the backrest as in feed in the spindles. A few hits with the dead blow mallet and I check that the backrest is seated properly according to the pieces of tape I put as depth guides on each one of the ends spindles. A final check with the tape measure, and the backrest and spindles are done. 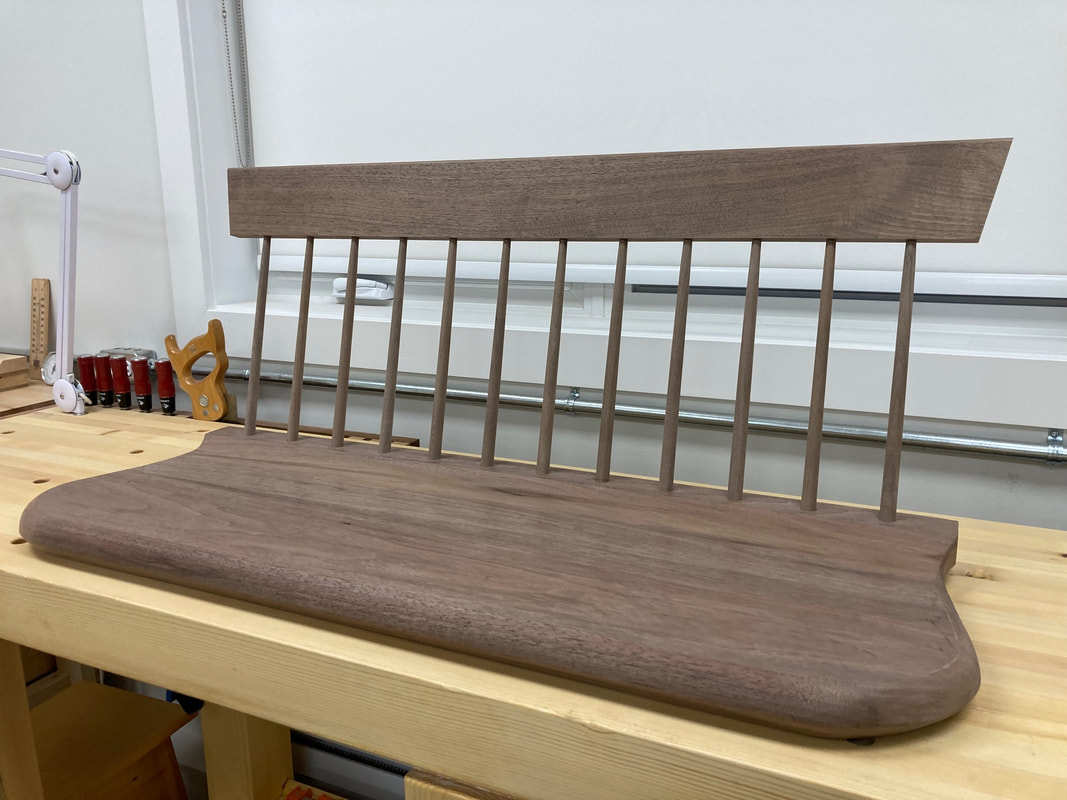 Spindles and backrest glued to the seat To complete the assembly, I turn over the bench and proceed with gluing the legs and stretchers components to the seat. Pretty straight forward process; add glue to all of the mating surfaces and put it all together using a dead blow mallet and one clamp to help seat the stretchers into the legs mortises. No need to leave any clamps on, once the parts are in where they should be, leave everything to dry for a few hours before moving the bench around. 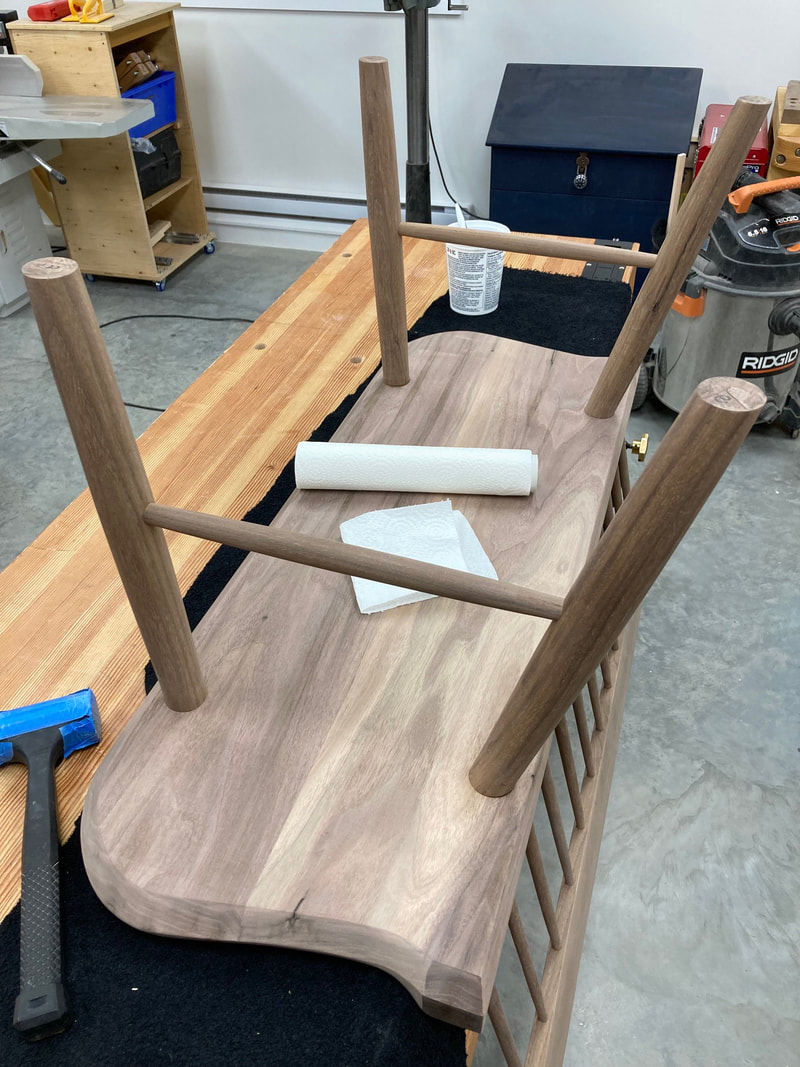 Legs and stretchers glued to the seat 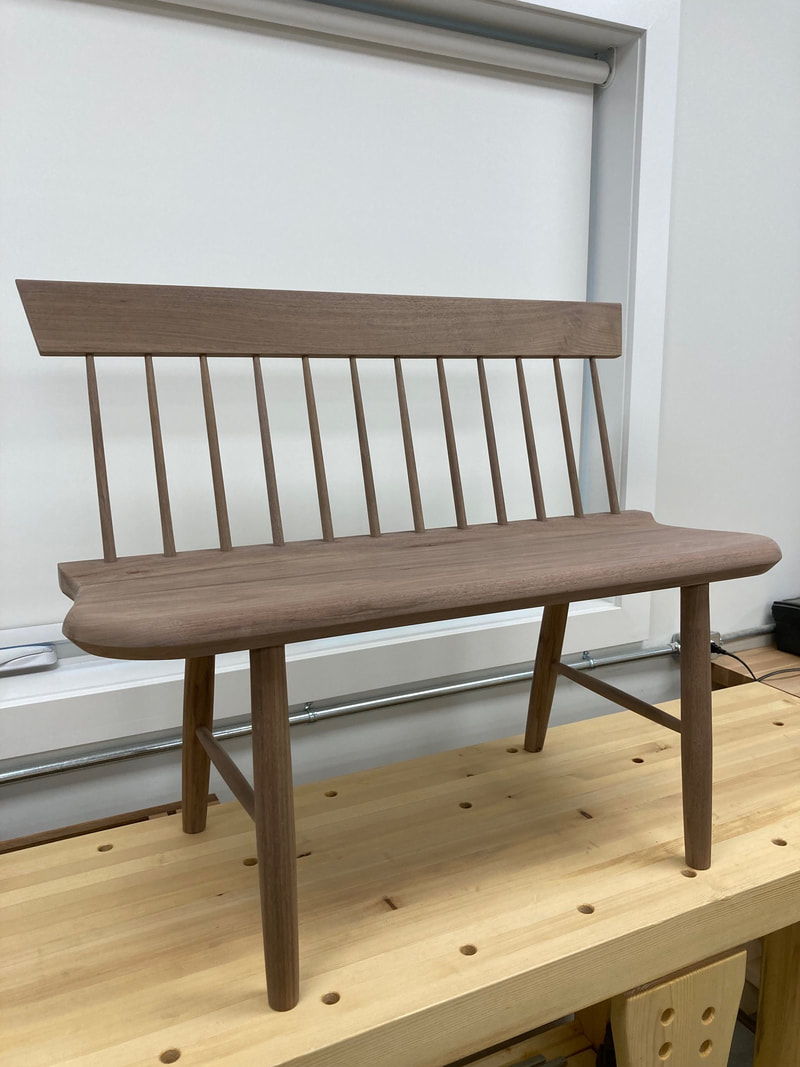 The final product minus the oil finish The next day I trim the legs so the seat is level and has the wanted back tilt which is very little on this design since the slope carved out of the seat acts as the desired angle for seating comfort. For the finish, this particular bench will get two to three coats of pure Tung oil. And there it is, with that the Shaker Settee is complete.
Pascal Teste
0 Comments
Note: I forgot to mention before that this blog series was written while I was making two benches at the same time. One in red Oak and the other smaller one in Black walnut. This is why you will see pictures showing different size and coloured components. Sorry for the confusion. 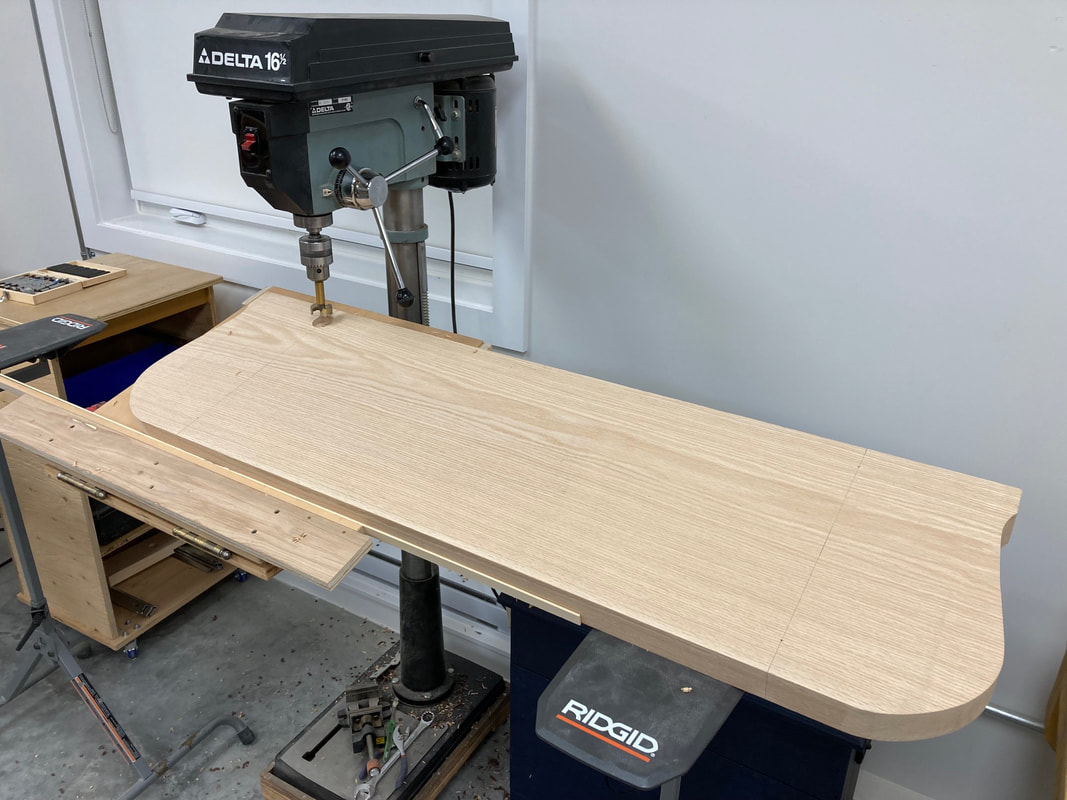 Set-up at the drill press The next step in this bench build, is to drill the mortises in the seat blank that will receive the spindles that hold the backrest and also to drill the mortises for the legs. For accuracy and repeatability, I like to use the drill press to do the task. With the help of an adjustable tilting table clamped to the drill press cast iron table, I can easily set the angle I want by sighting a bevel gauge to the drill's chuck. Now that the jig is set and secure, I simply rest the seat blank on it and start drilling. Because of the length and weight of the seat blank, I place on each side of the drill press work stands to help support one end while I drill the mortises that are at the the other end. 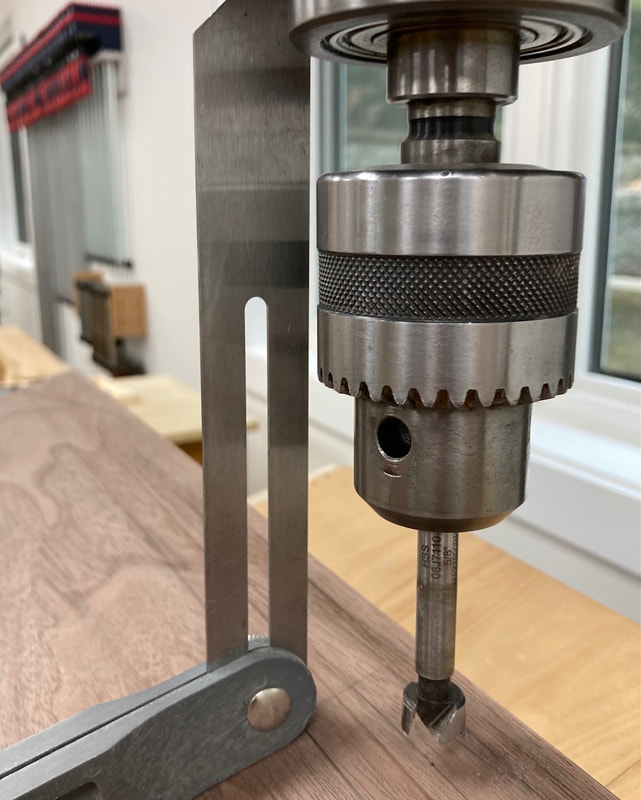 Making sure the angle is correct 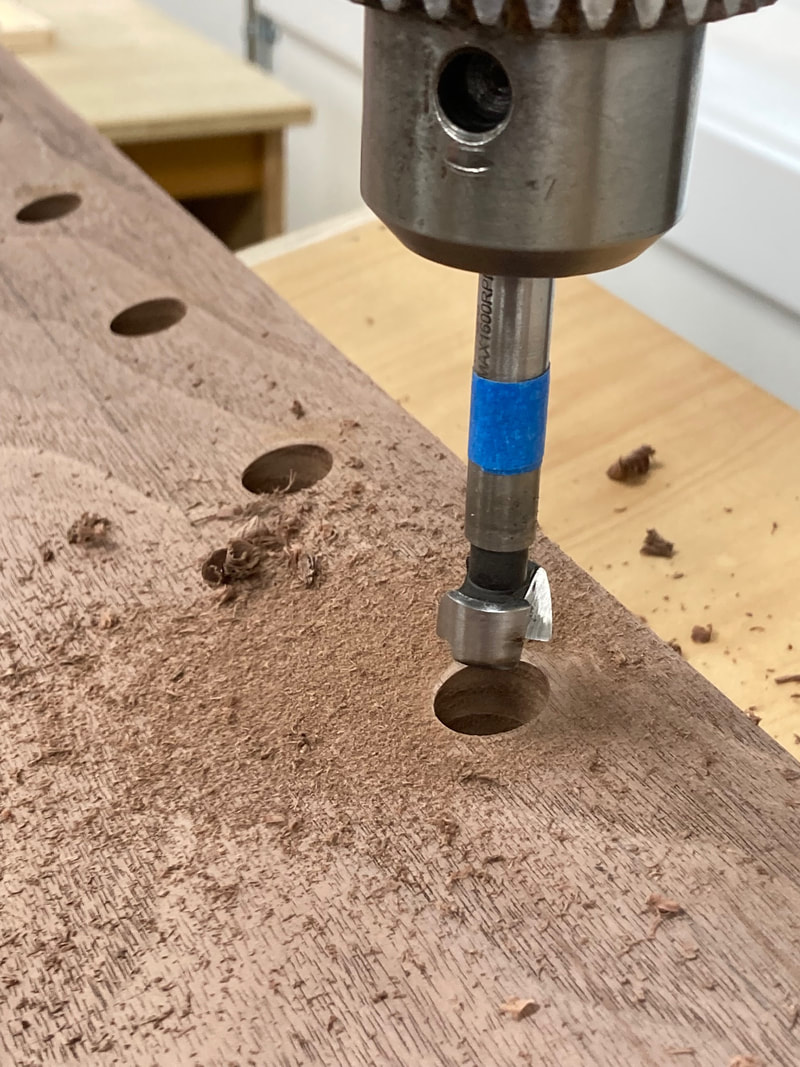 5/8" mortises in the seat for the spindles 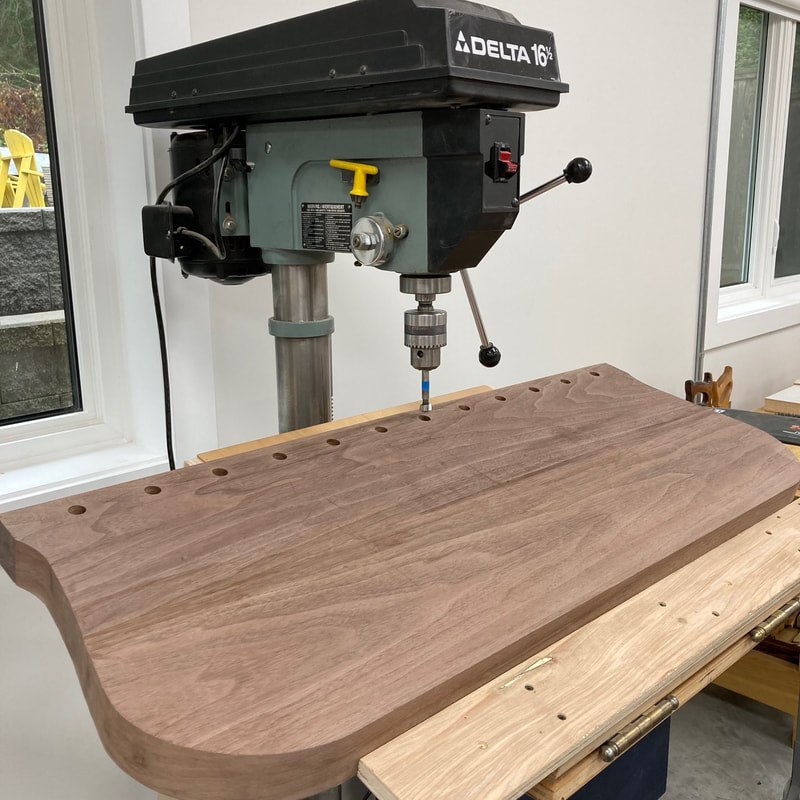 Backrest spindles mortises done After all of the spindles mortises are drilled, I flip over the seat blank and do the rear leg mortises first because they have the same angle as the spindles, so the jig set-up stays the same. As pointed out in Christian Becksvoort's article "Shaker Noir" the legs mortises on this bench were a weak point. One easy fix to this problem would be to drill through mortises and have wedged through tenons hold the legs securely. Many makers build them this way today because it is a strong and reliable joint. However, for this bench, as on the originals made by the Shakers, I like to keep the top surface of the seat "clean" and not have through leg mortises showing. So to make sure the leg joints are strong, I have adopted Becksvoort's method of using a stepped mortise combined with a shouldered leg tenon. This approach increases the bending moment capacity of the joint. See study in the Forest Products Journal 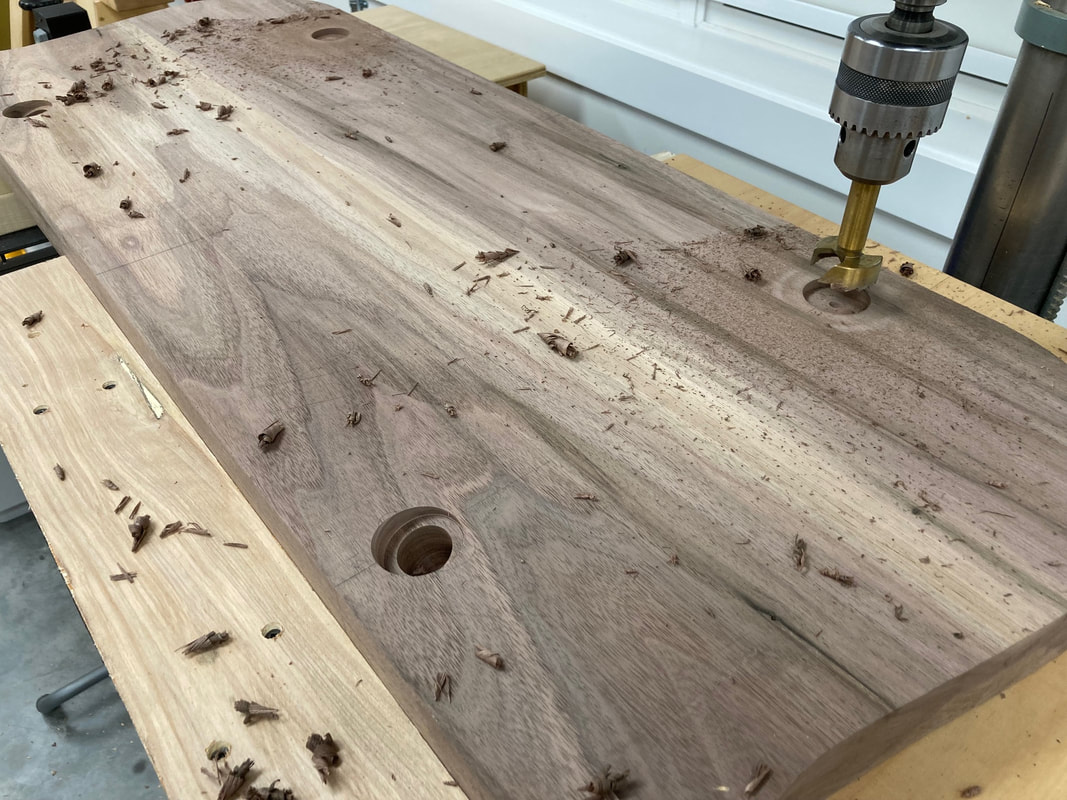 Mortises for the legs 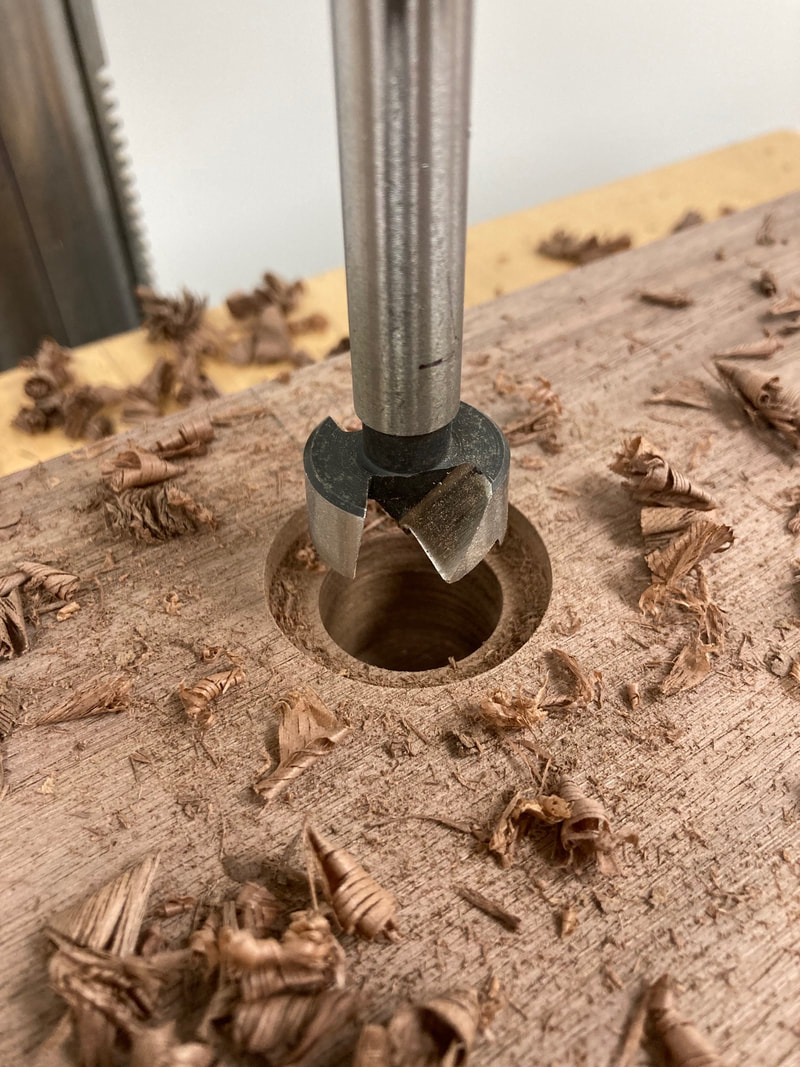 Stepped mortise. 1 1/2" to 1" combined with a shouldered tenon provides a strong joint 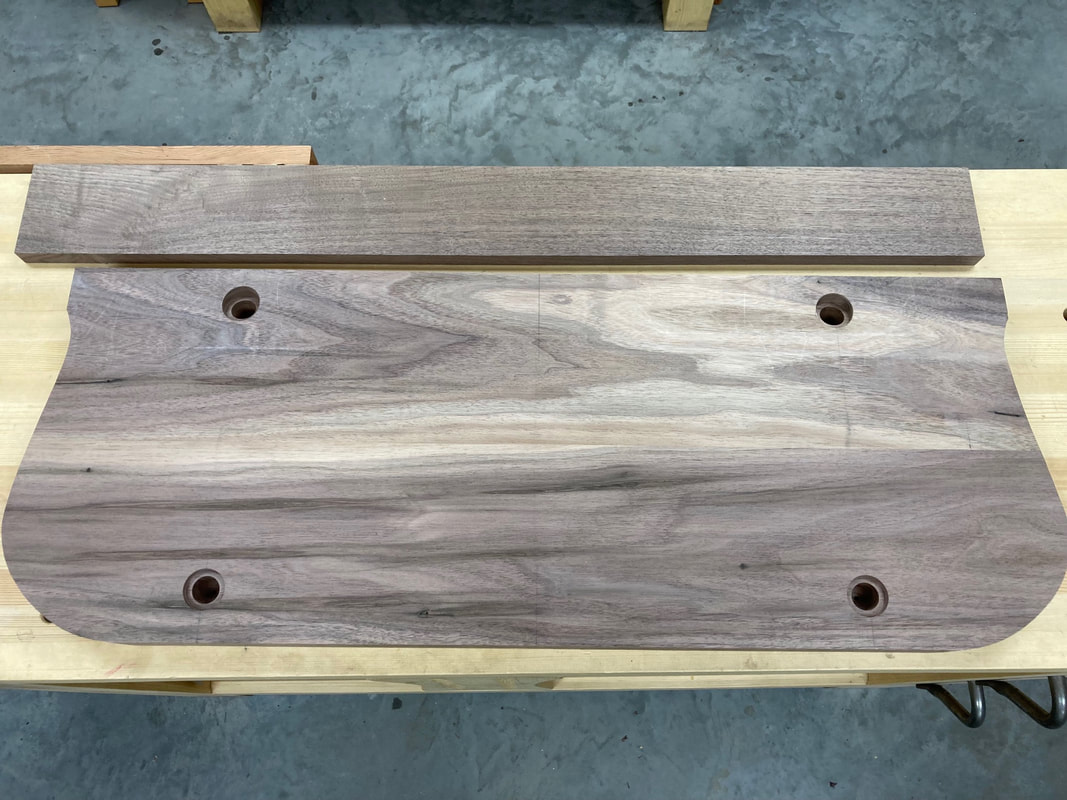 Legs mortises done Finally to conclude the drilling session, I bore the mortises in the backrest that will receive the spindles and join it to the seat. The design of the bench calls for tapered spindles, so these will be 3/8 inch in diameter. I use a block of wood perfectly square to the drill press table and clamp it down so it can act as a fence for me to hold the backrest straight and drill accurate holes. 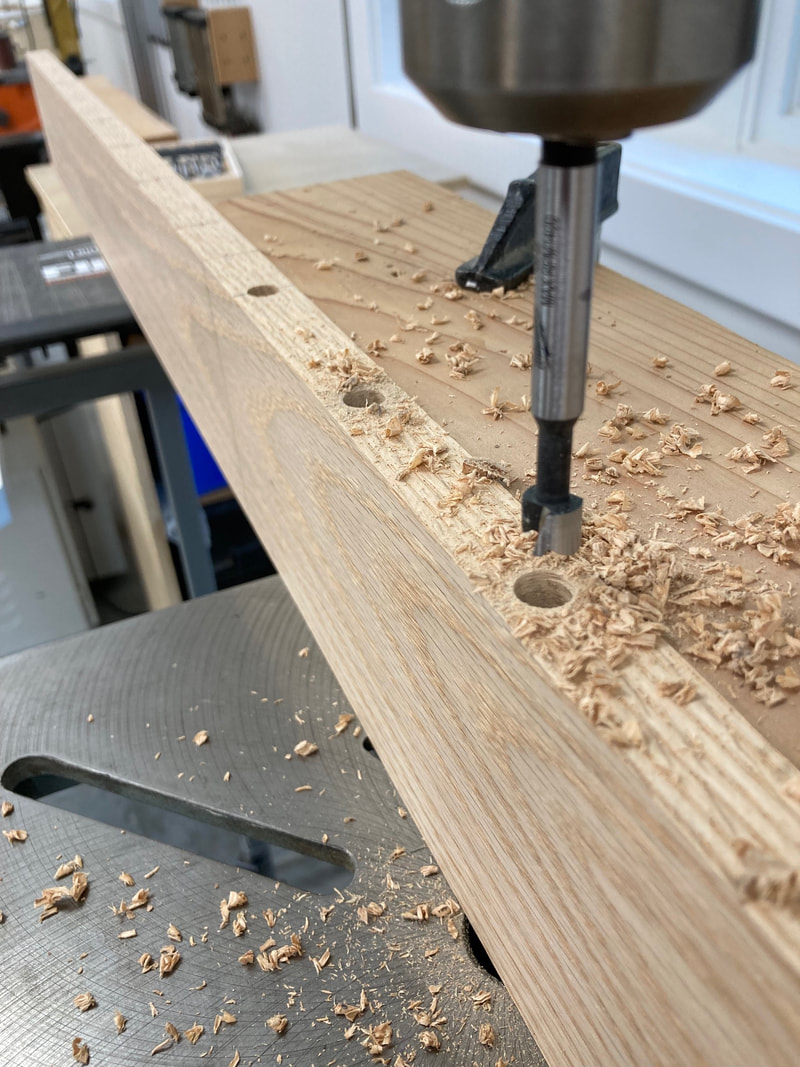 3/8" mortises in the backrest 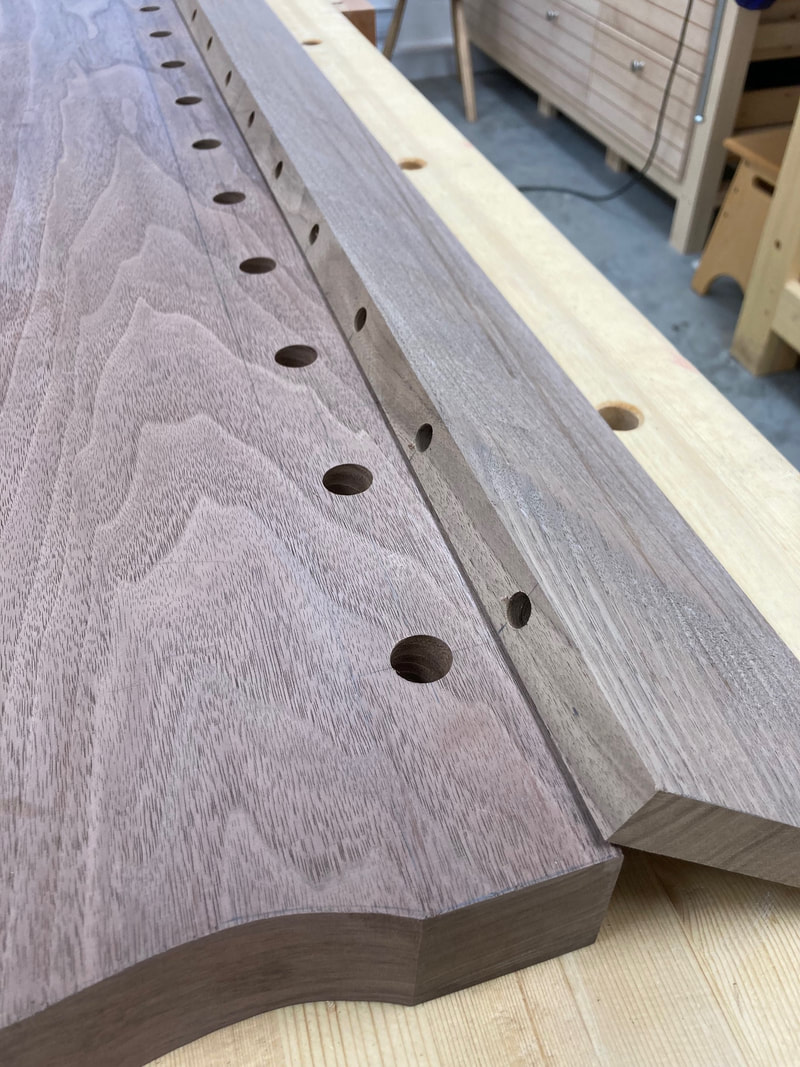 Spindles mortises all lined up. 5/8" in the seat and 3/8" in the backrest The last to do before moving on to the next phase of the build, is to taper the backrest. To do this I use the thickness planner and a simple jig. I screw a small fence to a straight and flat board and tack a 1/8" shim 3 3/4" away from the fence. The bottom of the backrest butts against the fence and the top rides on the shim. The jig is clamped to the table of the thickness planner. The shim tilts the face of the backrest, thus creating after passing through the planner, an angle. Then I flip the backrest around and plane the other face but this time using a 1/4" shim. The result is a perfectly tapered backrest 3/4" at its base and 1/2" at the top. 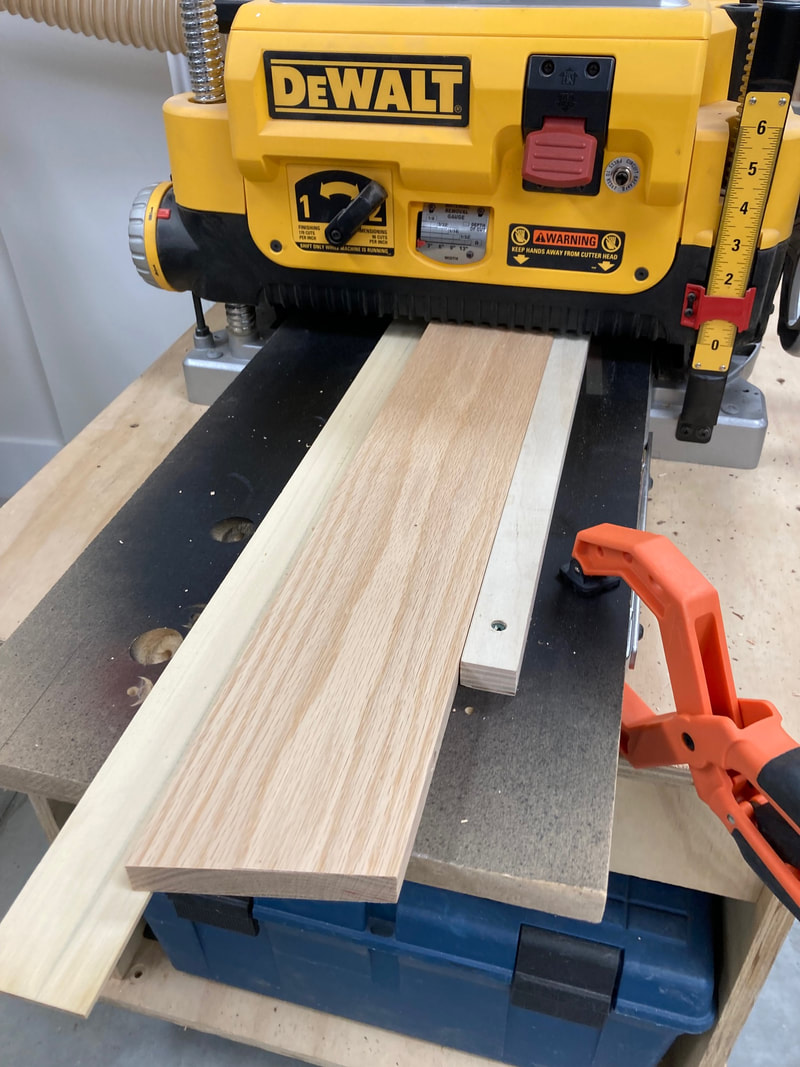 Creating the taper on the backrest with the thickness planner 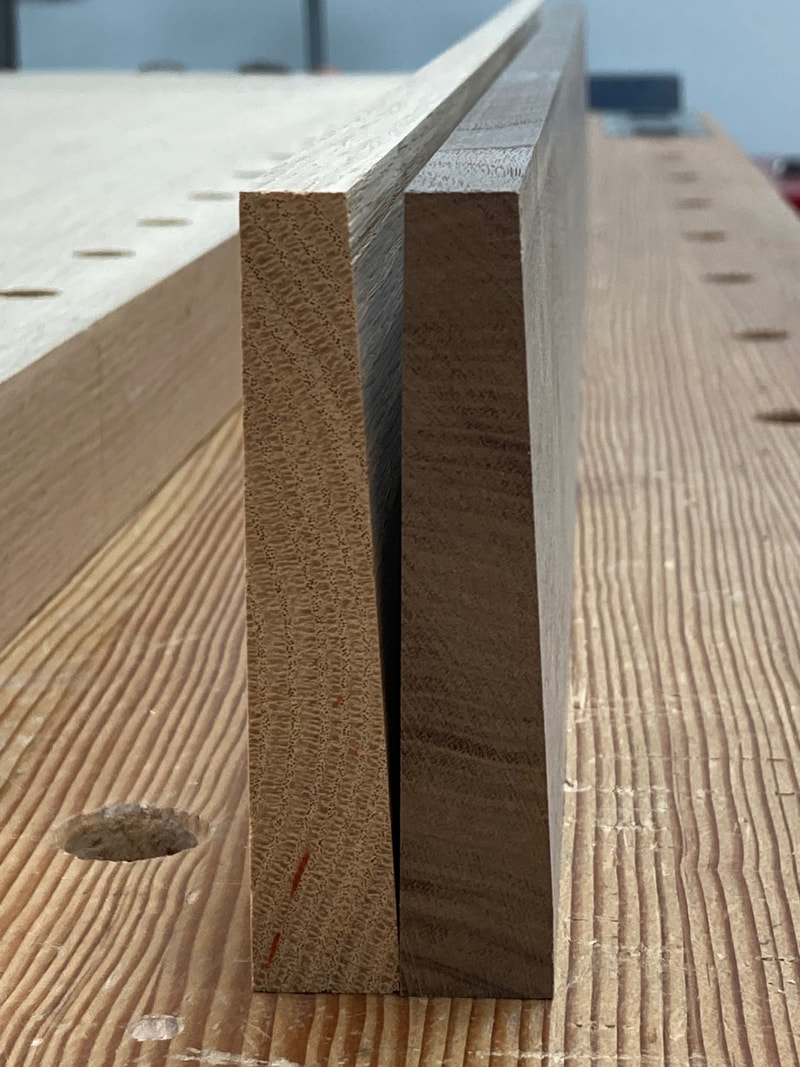 Tapers done 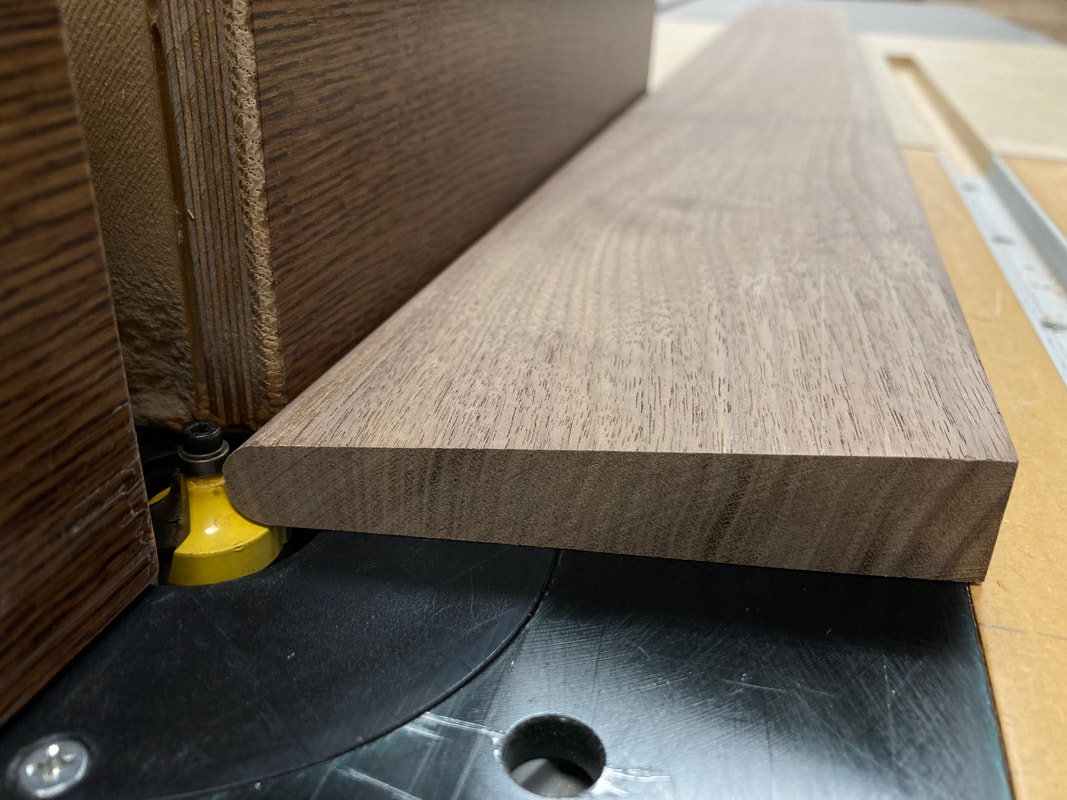 Top of the backrest gets a round over at the router table To complete the backrest, I round over the top at the router table using a 1/4" round over bit. In the next post I will show how I produce the somewhat intricate shape of the seat by using both power tools and hand tools.
Pascal Teste When I purchased this 8/4 (2 inch thick) board I did not noticed that it had quite a bit of sapwood on its edges. After I milled the board, the sapwood became clearly visible and I realized that I was going to have to change how I had originally envisioned using this piece of wood. What I mean is that I wanted my seat blank to be all heartwood. The board was 12 inches wide and I needed 15 inches for the bench seat. Unfortunately, because of the sapwood, I couldn't just rip a 3 inch piece off of one board's edge and glue it to the other one to make the 15 inch heartwood piece I wanted. Instead, I had to rip 2 inch strips off of each edge of each board and used the two remaining centre sections to make the 15 inch wide all heartwood seat blank. 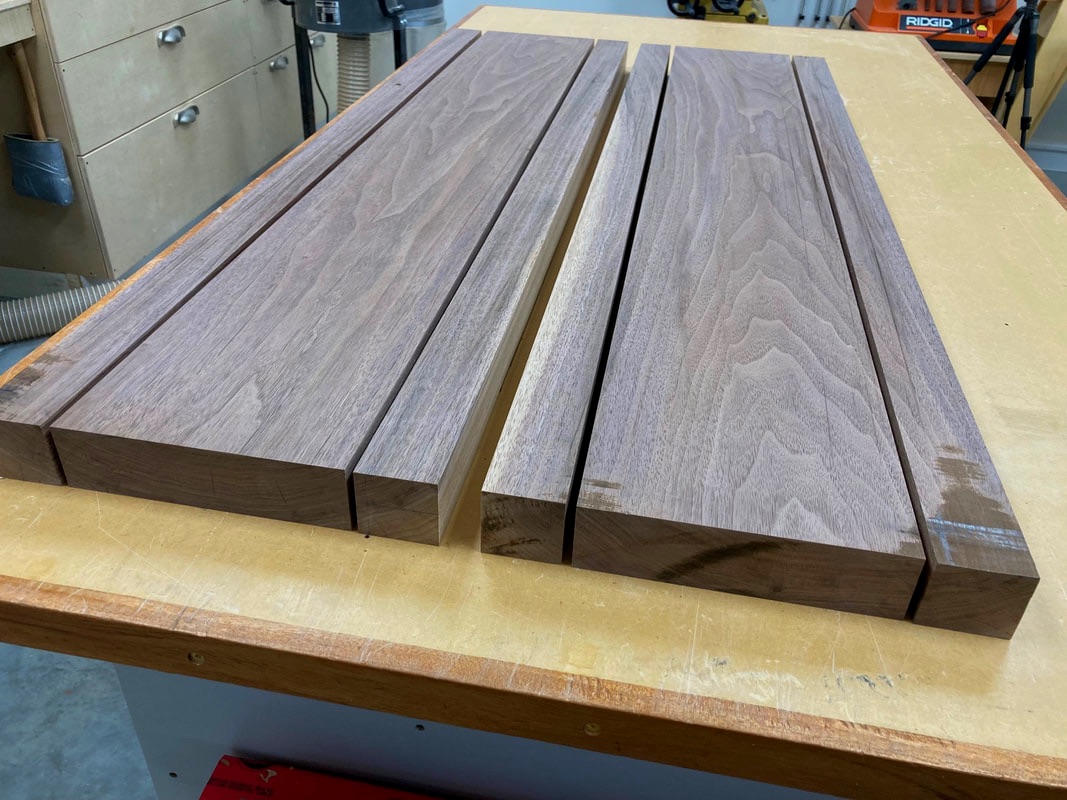 I ripped 2 inches off of both edges on each board to get to the heartwood. 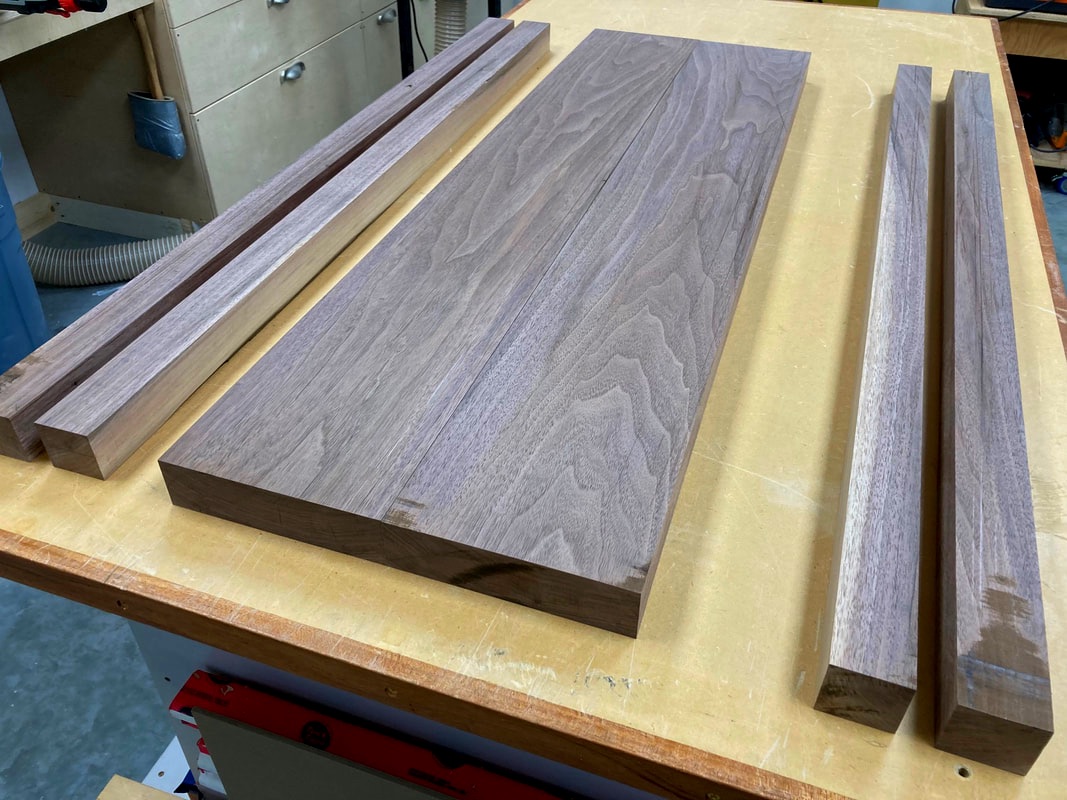 The two centre pieces allow for a 15 inches wide seat blank of homogenous heartwood grain. Before glueing up the two boards, I took the time to match the two edges that allowed for the grain pattern to blend the best, and then jointed one last time the mating edges on the jointer for a clean and tight joint. Then I traced on one end, the shape of the seat's profile so I could mark where to put the biscuits along the joint. If this step is neglected, there is the risk of exposing the biscuits later when shaping the seat. Finally I went ahead and cut the slots for the biscuits with the biscuit jointer. 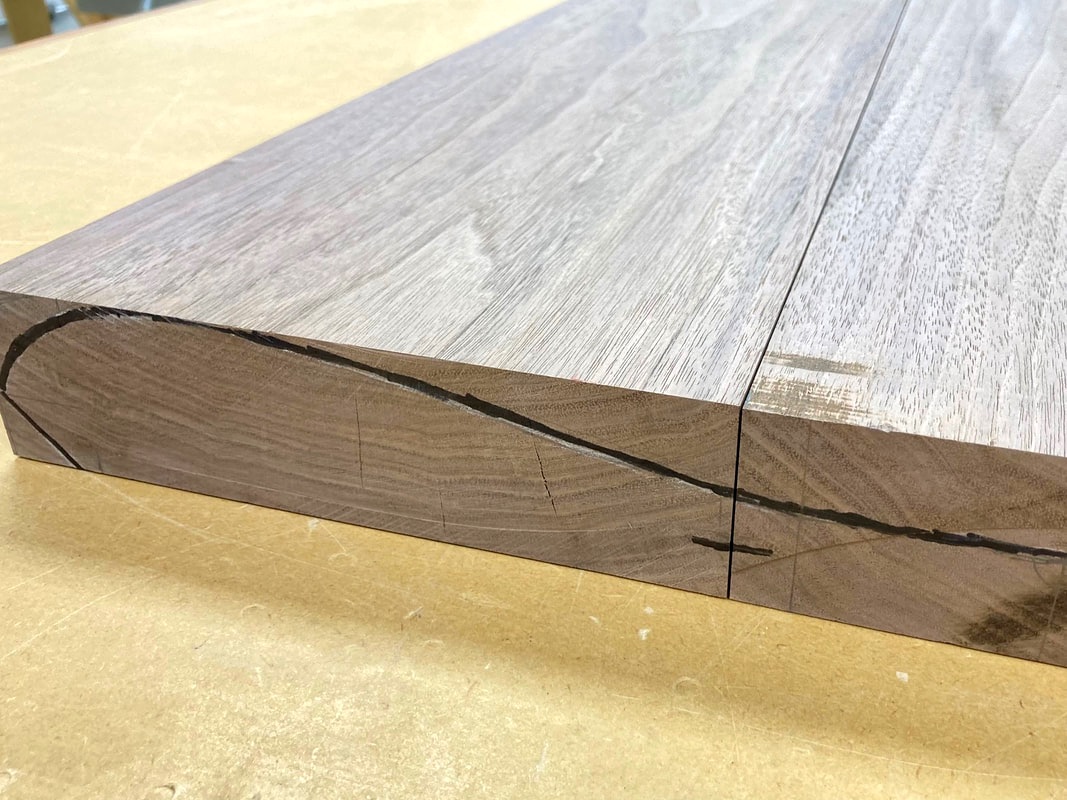 Profile of the seat's shape drawn on one end of the boards to determine where to put the biscuits 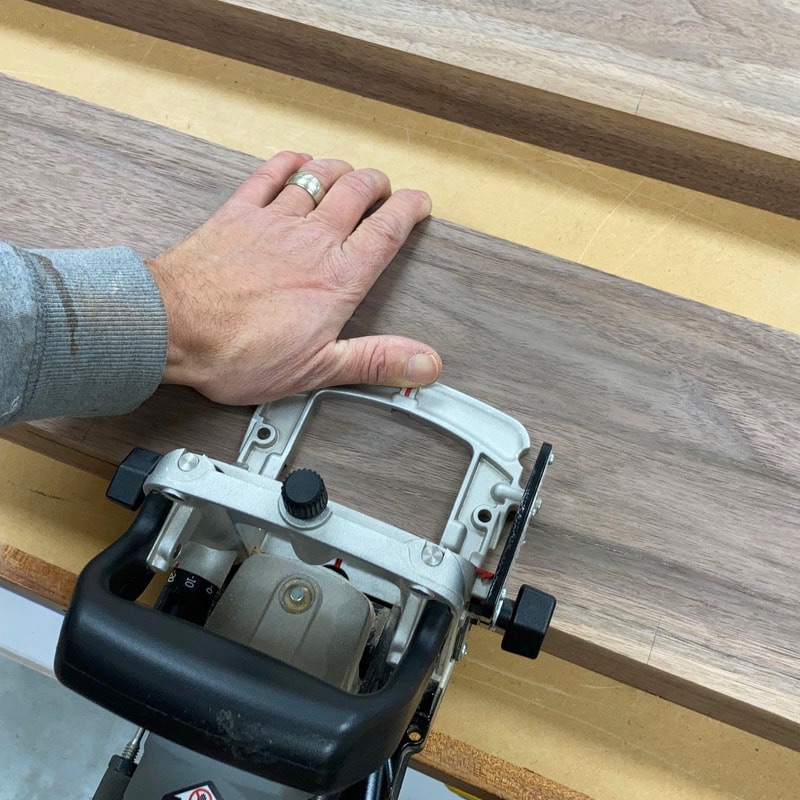 Biscuit jointer action 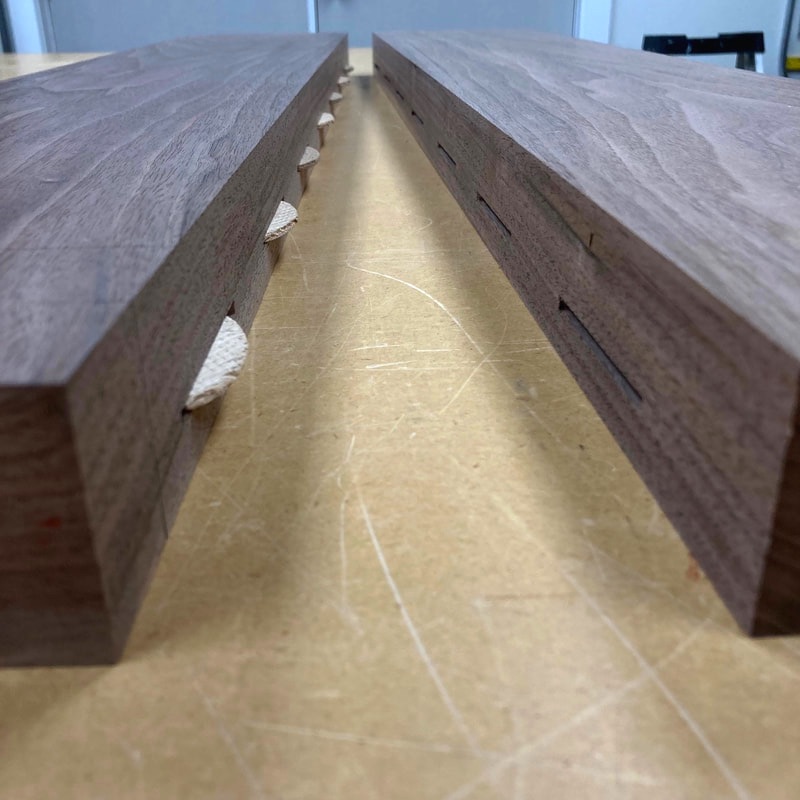 The joint is located where the seat will be at its thinnest, so I did not skimp on the number of biscuits. With the joinery done, I glued up the two boards together and left the clamps on overnight. The next day, I drew the outline of the seat and marked the location of the spindles and legs mortices. 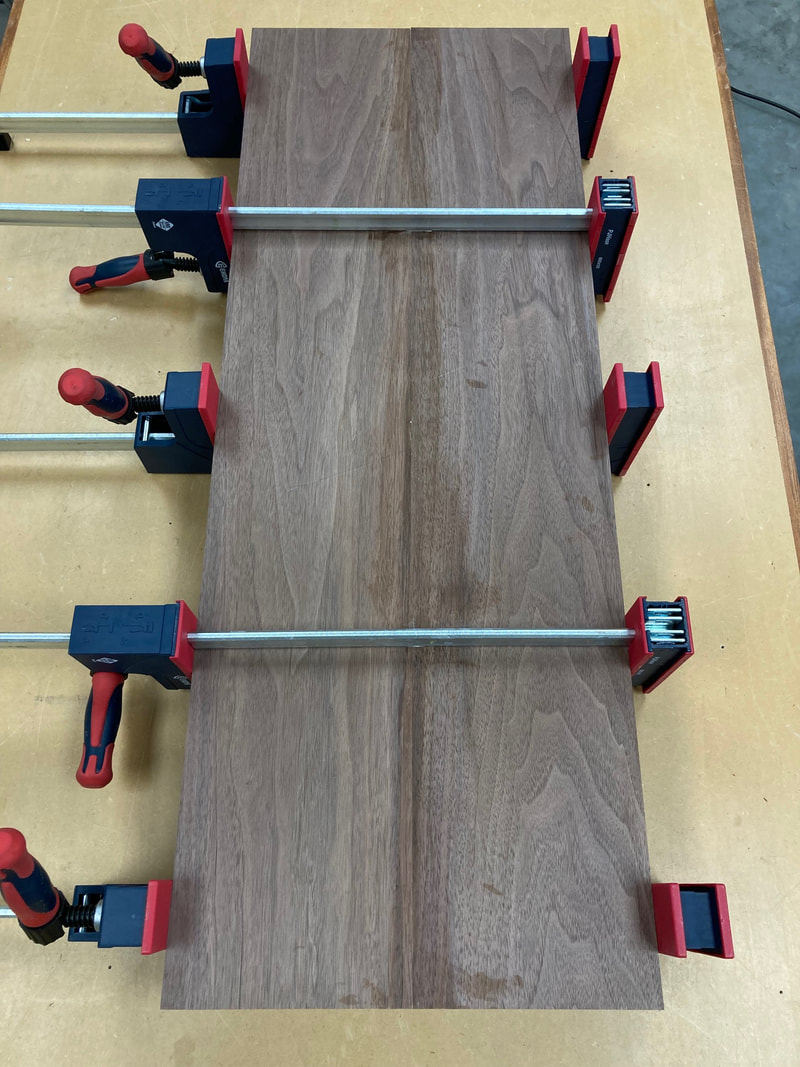 Clamped for the night 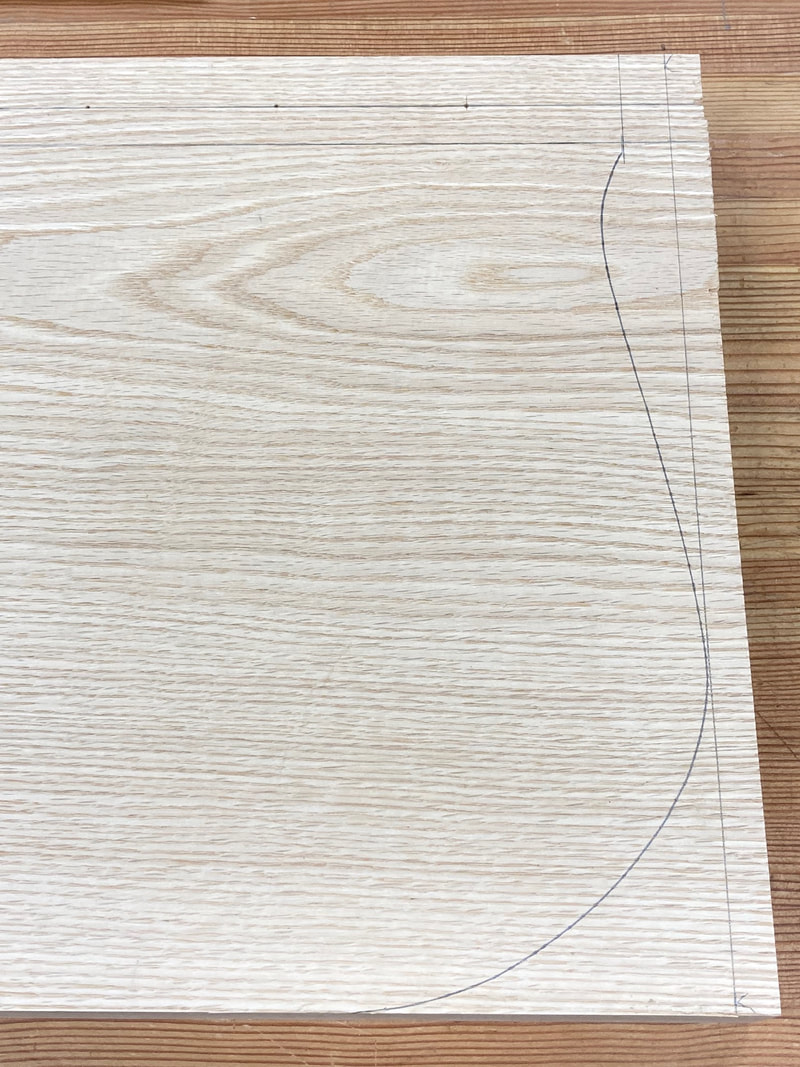 The seat's profile and the layout of the backrest spindles (on red oak for more clarity) I used a jigsaw to do cut of the seat's profile, and then I sanded the rough cut to my layout line with an oscillating edge sander to get a fair curve. Before shaping the seat I will drill all of the mortises for the spindles and the legs. It is much easier to do this now, since everything is flat, parallel and square. 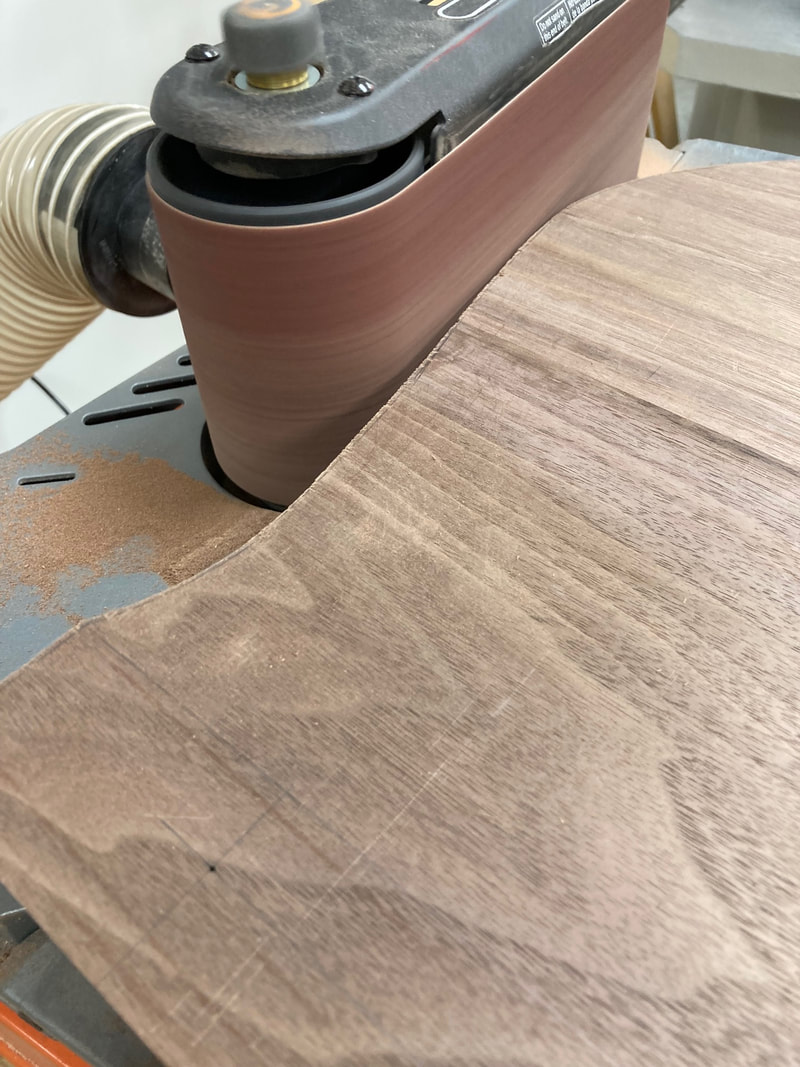 Smoothing out the cut with an edge sander 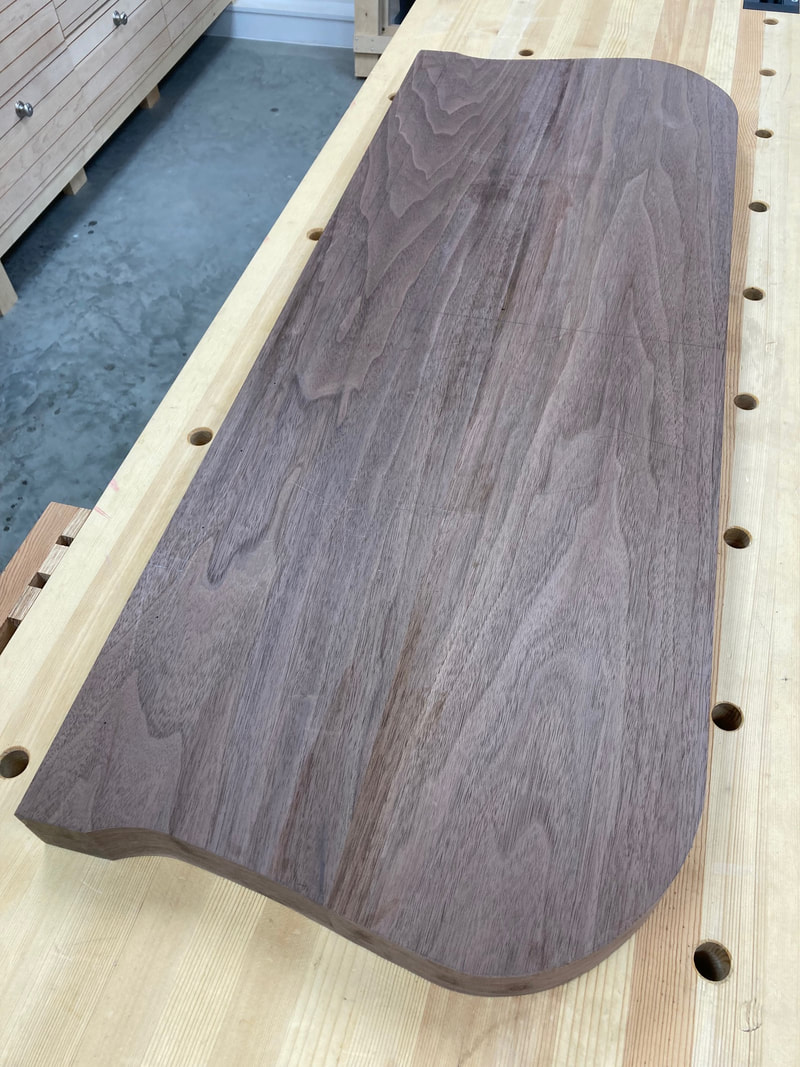 The seat blank The next post will show how I drill the mortises for the spindles and the legs and how I do the taper on the backrest.
Pascal Teste 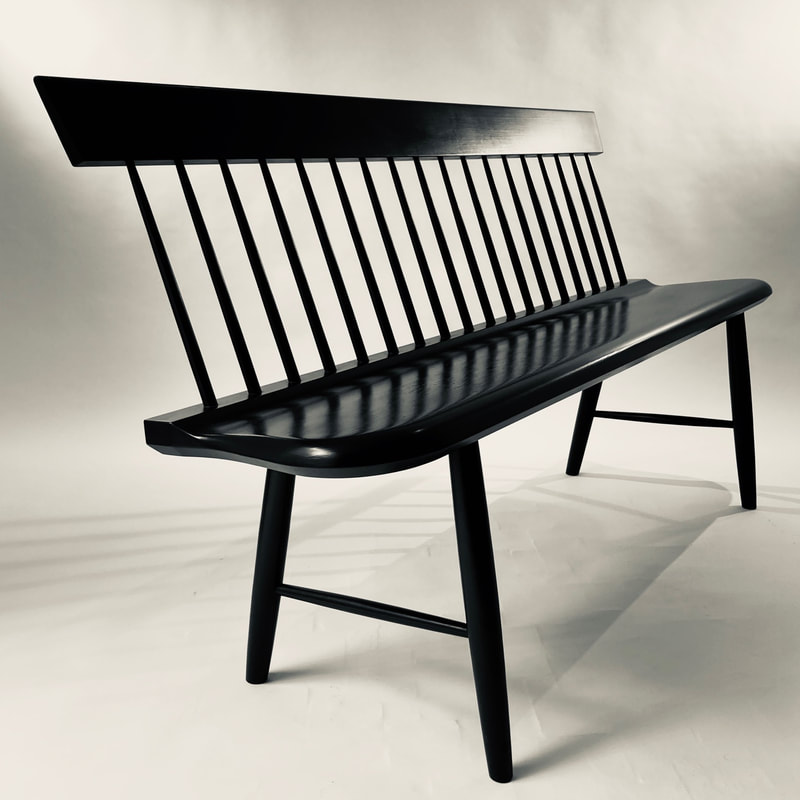 This example is 5 feet wide and made of hard maple. This classic Shaker bench (often called a Shaker Settee), is one of my favourite pieces because it attractively captures the elegant style of the Windsor chairs, and at the same time presents itself in a sleek contemporary form without compromising on comfort. If you ever have the chance to sit on one of these benches, you will find that they are surprisingly comfortable thanks to their ergonomically shaped seat and the gentle seat tilt and backrest angle combination designed into them. Finally, the whole thing is a delightful tactile experience, since every piece of the bench is shaped in one way or another. 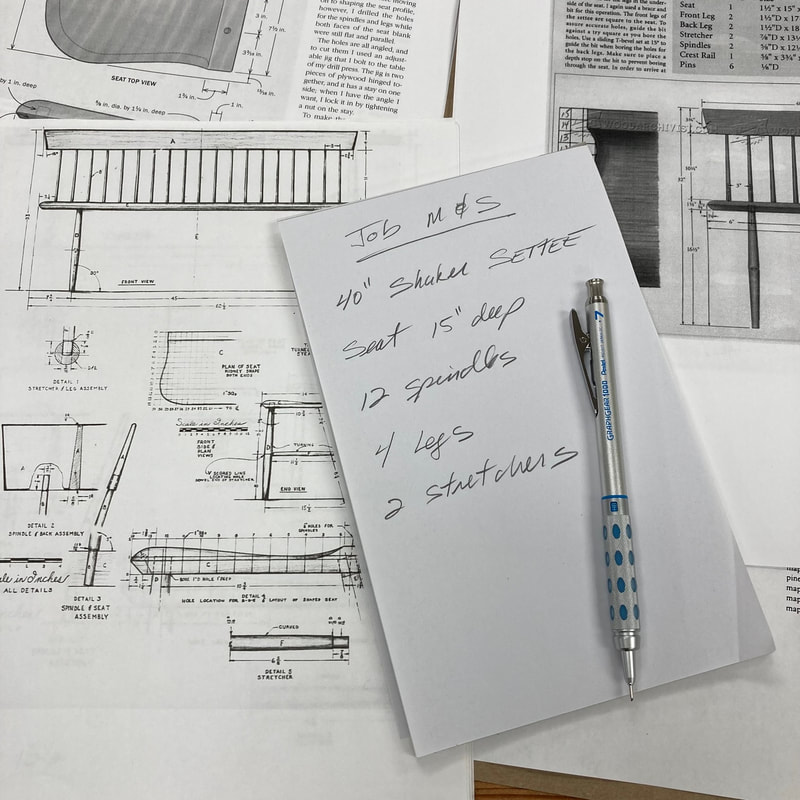 Helpful information like "How-to" articles and plans are available out there. I have built a few of these benches and even though I am pretty good at figuring out how to make furniture just by looking at a picture, for my first one, I was happy to find the plans in John Kassay's "The Book of Shaker Furniture"and an article written by Christian Becksvoort in Fine Woodworking magazine on how-to build one. 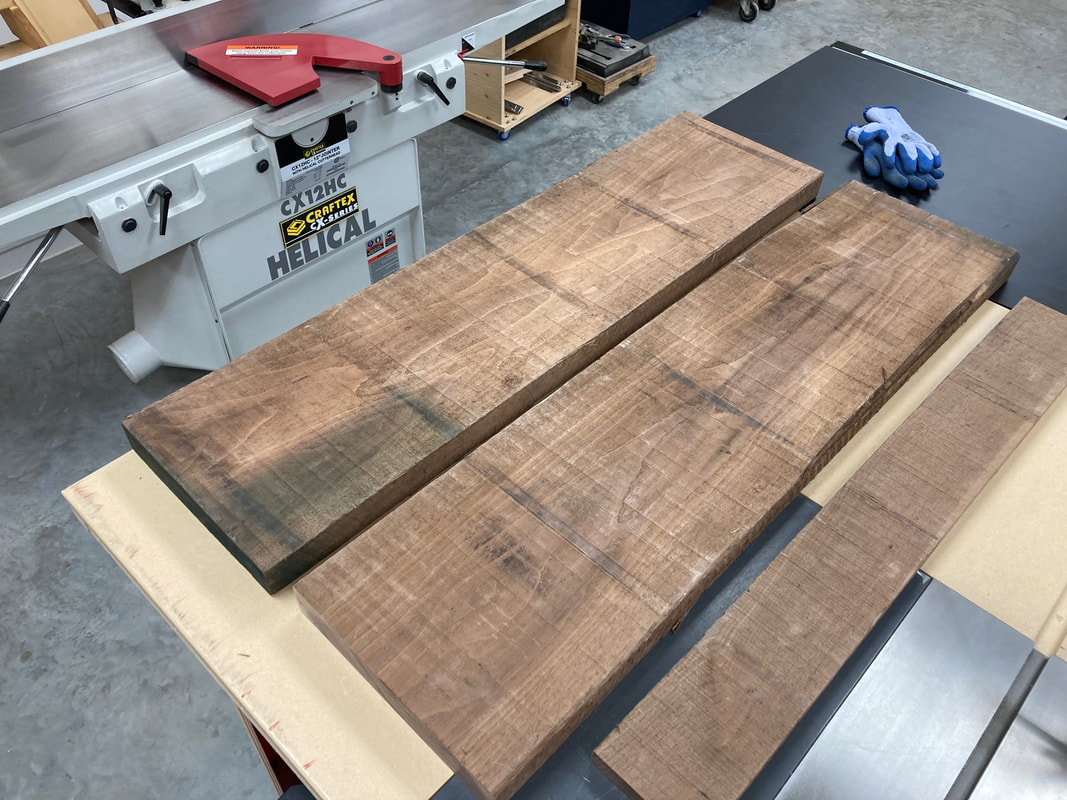 After choosing your lumber, its time to mill it to size. The first step of any woodworking project is to pick your lumber and get it ready for milling. The bench I am making here, is going to be in Black Walnut and fairly small at 40 inches wide. So if I'm lucky, with one board of 8/4 (2 inches thick) by 12 inches wide and 96 inches long, I will be able to make all of the parts except the backrest. For that I will be using a piece of 4/4 (one inch thick) by 5 inches wide and 44 inches long. For now these are all cut to slightly larger dimensions and will get re-cut to their final dimensions later. 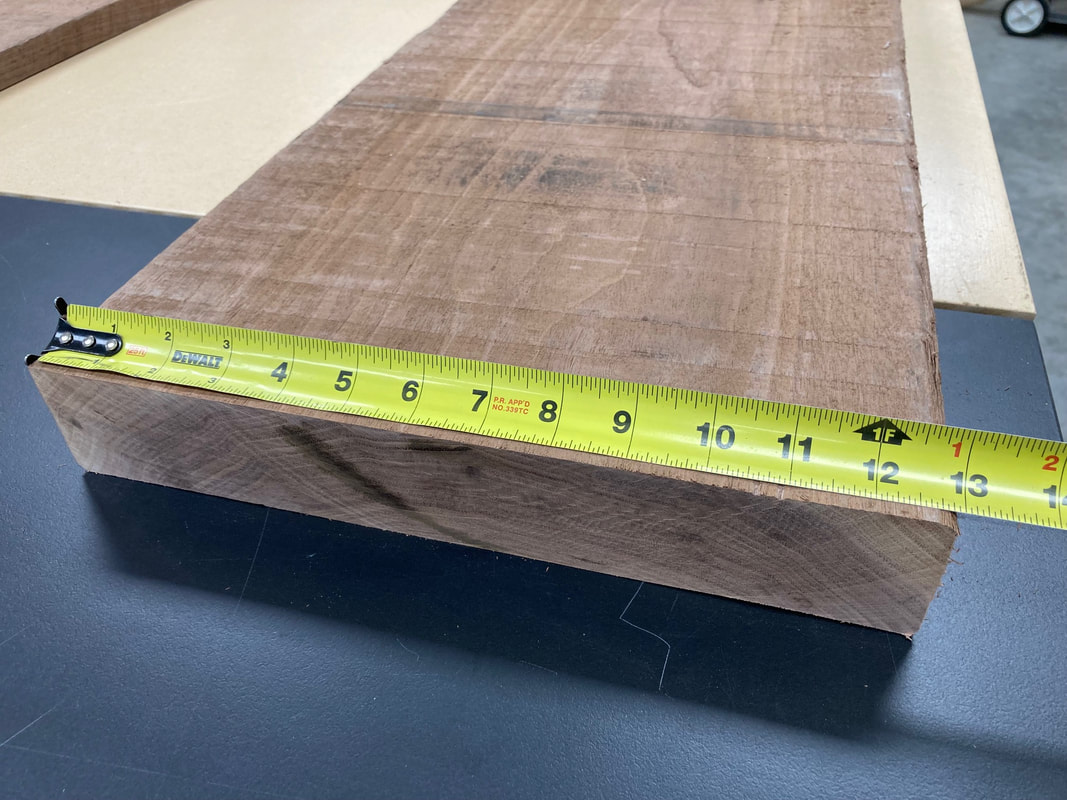 The 2 inch thick board I am using will be 12 inches wide after I'm done milling it. As you can see on the picture above, the board I am using is roughly 12 inches wide and I need the seat of the bench to be 15 inches wide. To achieve that, I will have to glue up a piece of the other section of board I have to make up the difference. However, before that, I have to mill my boards, which means first jointing them on the jointer to get one face and one edge flat and straight. Most of the time I will rip the excess off with the table saw before running all the pieces through the thickness planner to dimension the boards to an even thickness. 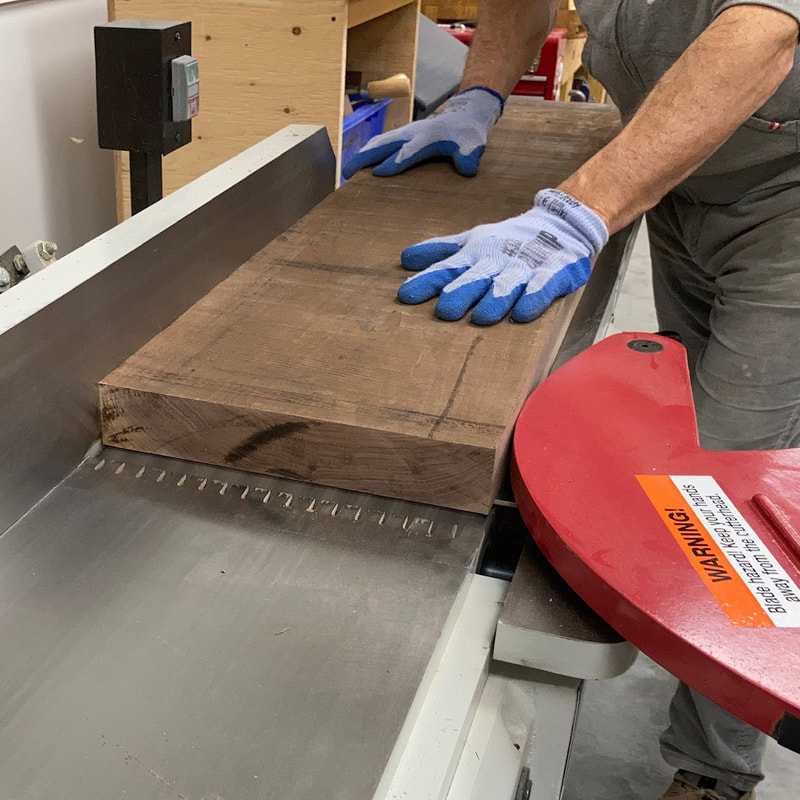 Jointing one face on the jointer 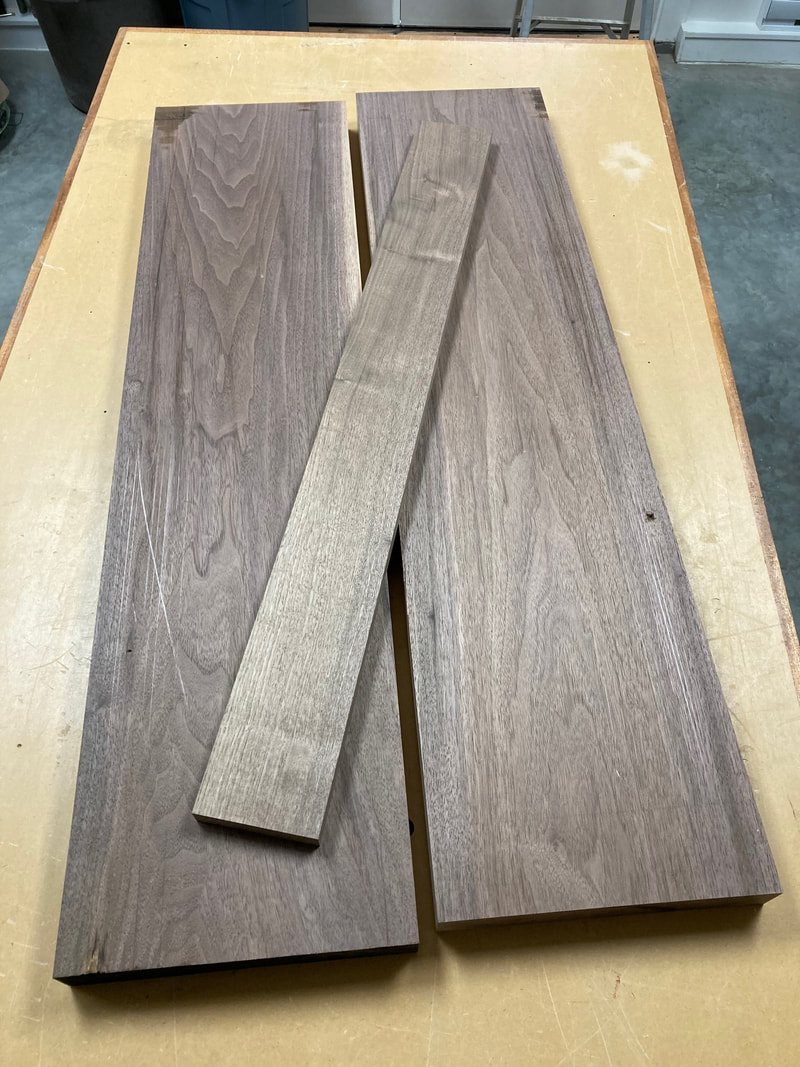 The same three pieces as on the earlier picture after the milling process. On my next post I will show how I go about glueing the two pieces together in terms of aesthetics and strength.
Pascal Teste |
AuthorPascal Teste Archives
March 2023
Categories
|
 RSS Feed
Copyright 2023 © Pascal Teste Furniture l site design & powered by Egami Creative